
I absolutely adore making treats that combine nostalgia with a festive twist, and my Pumpkin Rice Krispie Treats Recipe does just that! These little pumpkins are not only fun to make, but they capture the perfect balance of sweet, gooey marshmallow and the crisp crunch of Rice Krispies, all dressed up in a charming Halloween-inspired look. Whenever I pull these out for parties or family gatherings, they disappear almost instantly, and I’m always thrilled to share this playful recipe with friends who want to add a bit of pumpkin patch magic to their dessert table.
Why You'll Love This Pumpkin Rice Krispie Treats Recipe
What really makes this recipe special to me is the delightful combination of flavors and textures. The buttery, melted marshmallows fuse perfectly with the crispy cereal, while the subtle vanilla adds a touch of warmth. Once you dye the marshmallow mixture a soft orange, it feels like autumn in every bite. I also love how the green icing vines and mini Tootsie Roll stems turn these treats into tiny edible pumpkins that bring a whimsical vibe to any occasion.
Another great reason I keep coming back to this Pumpkin Rice Krispie Treats Recipe is how incredibly easy it is to prepare. The steps are straightforward without requiring any fancy ingredients or complicated processes, so even beginners can confidently make these. I find them ideal for Halloween parties, fall potlucks, or even weekends when you just want a fun, festive treat that everyone will enjoy. Plus, they’re great for involving kids in the kitchen, because who doesn’t love shaping and decorating little pumpkins?
Ingredients You'll Need
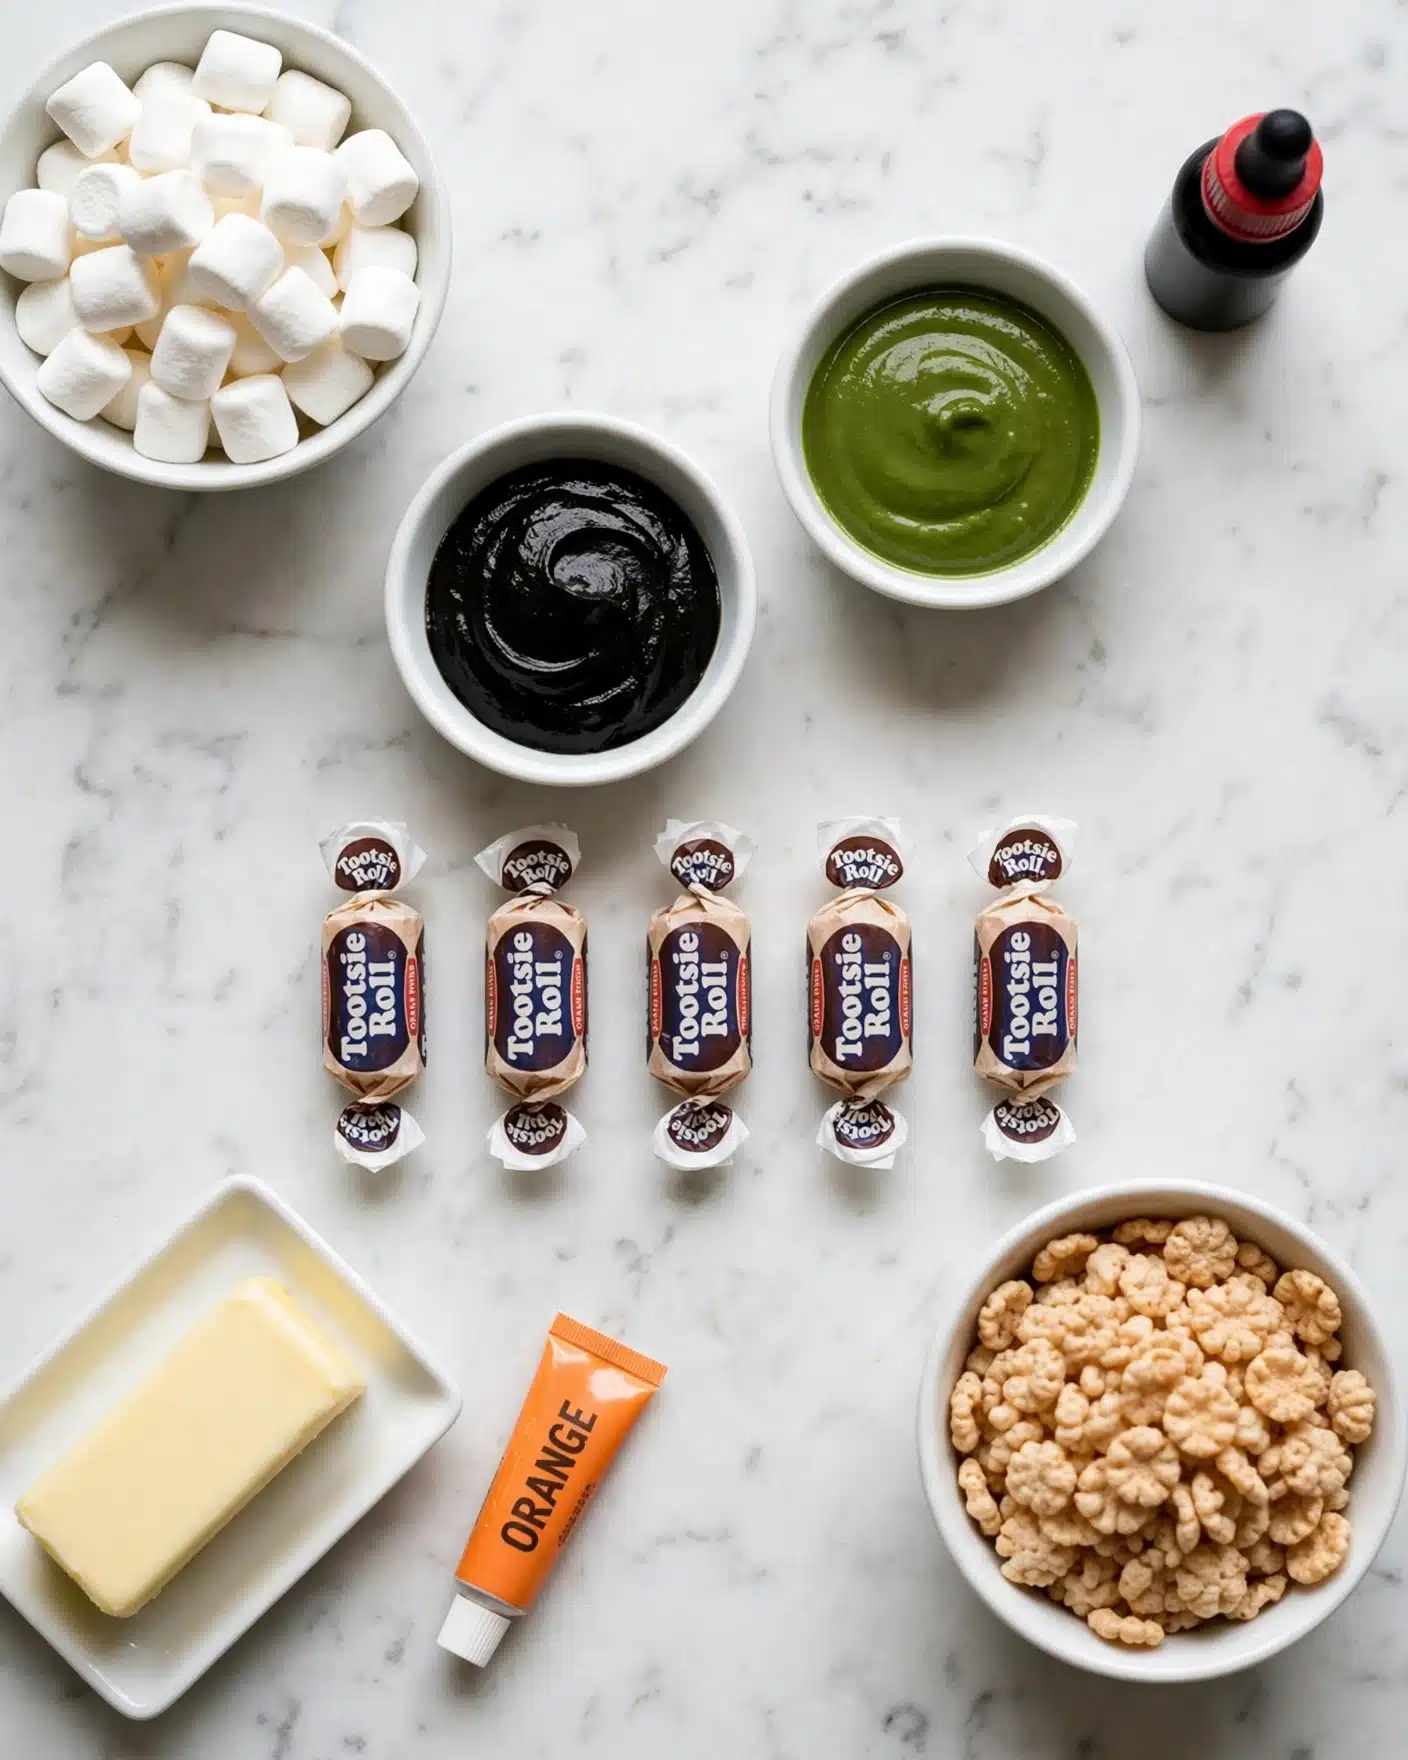
The ingredients for this recipe are simple but essential, each one playing a crucial role in creating the perfect pumpkin shape, taste, and texture. From the melted butter that keeps everything smooth, to the vibrant orange food coloring that brings the pumpkins to life, every element counts.
- Salted butter: Provides a rich, creamy base for melting the marshmallows and ensures they don’t stick to the pan.
- Mini marshmallows: The key to that signature gooey texture everyone loves in Rice Krispie treats.
- Vanilla extract: Adds a smooth, aromatic depth to the marshmallow mix that complements the sweetness.
- Rice Krispies cereal: Creates the crispy, crunchy texture that contrasts perfectly with the soft marshmallow.
- Orange food coloring: Gives the treats their festive, pumpkin-like hue that sets the mood for fall celebrations.
- Green icing: Used for piping vines and attaching pumpkin stems, adding adorable decorative detail.
- Small Tootsie Rolls: Serve as the perfect pumpkin stems, adding a bit of chewiness and color contrast.
- Black icing: Ideal for drawing fun jack-o-lantern faces, personalizing each treat with spooky charm.
Directions
Step 1: In a large saucepan over medium heat, melt the salted butter gently until it’s completely liquid but not browned. This prepares the pan for the marshmallows and helps prevent sticking.
Step 2: Stir in the mini marshmallows and vanilla extract using a wooden spoon. Keep stirring frequently until all the marshmallows have fully melted and you have a smooth, glossy mixture.
Step 3: Add 5 drops of orange food coloring to the marshmallow mixture and stir well. If you want a more vibrant pumpkin color, gradually add a few more drops until you get the shade you like. Keep stirring for about 2 extra minutes to make sure the color is evenly incorporated.
Step 4: Remove the saucepan from heat and fold in the Rice Krispies cereal until every piece is coated with the orange marshmallow mixture. This step needs to be quick because the mixture starts to set as it cools.
Step 5: Lightly oil your hands or spray them with cooking spray to keep the mixture from sticking. Roll the mixture into 5 to 6 balls approximately 4 inches in diameter. Place each ball on a nonstick surface like parchment paper.
Step 6: Gently flatten the tops of each ball a little bit, then use a butter knife to make vertical lines around the sides, mimicking the grooves of a pumpkin.
Step 7: Let the pumpkin shapes cool and set completely at room temperature, usually around 30 minutes.
Step 8: Using green icing, attach a small Tootsie Roll on top of each pumpkin as the stem. Then, pipe curls and loops of green icing around the stem to create vines—this makes each pumpkin look even more adorable.
Step 9: Fill a piping bag with black icing and carefully draw jack-o-lantern faces on some or all of the pumpkins. This is the fun part where you can get creative with expressions!
Step 10: Let the decorated pumpkins sit for about 5 minutes to allow the icing to harden before serving them to friends and family.
Servings and Timing
This Pumpkin Rice Krispie Treats Recipe yields about 6 servings, perfect for sharing at a small gathering or enjoying over a few days. Prep time is roughly 15 minutes, largely spent melting marshmallows and mixing ingredients. Cooking time is minimal, mostly waiting for the marshmallows to melt and fully combine. Cooling and decorating will take about 40 to 45 minutes, which is essential for the pumpkins to firm up nicely and for the icing to set. Altogether, you’ll need about 1 hour and 15 minutes from start to finish.
How to Serve This Pumpkin Rice Krispie Treats Recipe
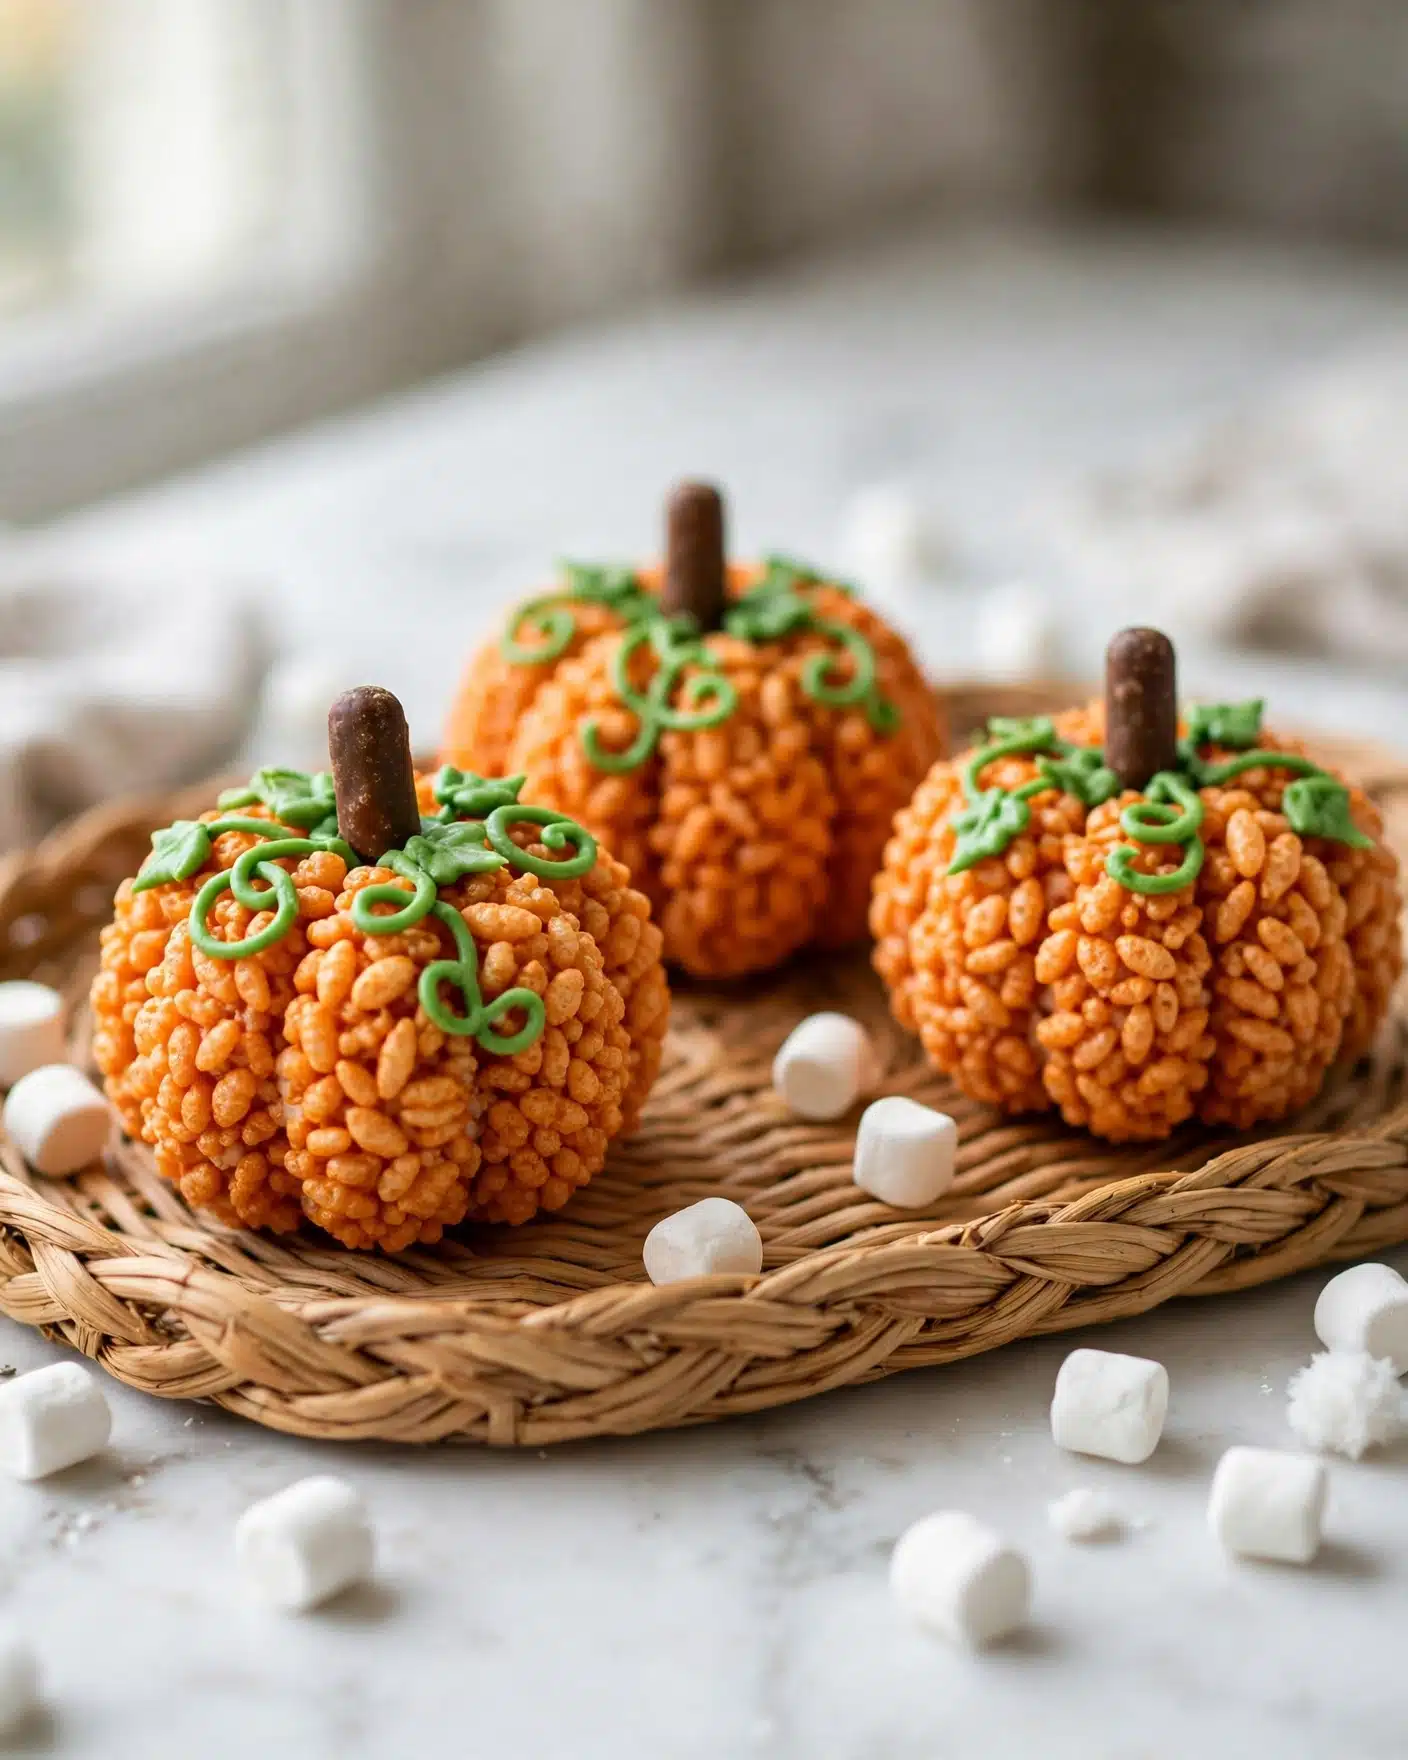
When serving these little pumpkins, I love to arrange them on a festive platter surrounded by autumn leaves or mini gourds to amp up the fall ambiance. They are perfectly bite-sized, so offering them with other simple finger foods makes for a delightful dessert table at parties or family dinners. I often suggest serving them at room temperature because this way the marshmallow stays chewy and the icing decorations stay intact.
For garnishing, a light dusting of cinnamon or nutmeg on the serving plate adds an extra hint of cozy spice that complements the sweet pumpkin flavor. I also find that pairing these treats with hot apple cider or a creamy spiced chai tea makes a lovely beverage combo, as the warm drinks balance the sugary sweetness beautifully without overpowering it.
These treats really shine during Halloween gatherings, fall festivals, or Thanksgiving celebrations. Since they’re so adorable and fun, they can also be a festive, no-bake activity to do with kids, turning serving into a joyful family moment. I like to slice them gently if I need smaller portions, but they’re just right as handheld pumpkins for casual snacking.
Variations
One of the reasons I love this Pumpkin Rice Krispie Treats Recipe is how easy it is to tailor it to your taste and dietary needs. For instance, if you want to make it vegan, swap out the butter and marshmallows for vegan alternatives, like vegan margarine and marshmallows made without gelatin. The texture remains wonderfully satisfying, and you still get those festive pumpkin vibes.
If you prefer a gluten-free version, simply use a certified gluten-free crispy rice cereal. This keeps the recipe accessible without sacrificing the classic crunchy texture everyone loves. Flavor-wise, you can experiment by adding a pinch of pumpkin pie spice or cinnamon to the marshmallow mixture for an extra seasonal kick, which truly elevates the taste.
For a fun twist, I’ve played around with different stem ideas such as using pretzel sticks dipped in green icing or even candy canes for a whimsical look. If you want to take it a step further, you could bake small pumpkin cookies to place alongside these treats for a mixed dessert platter. The possibilities are endless, and it’s so satisfying to make this recipe your own!
Storage and Reheating
Storing Leftovers
After making these Pumpkin Rice Krispie Treats, I store leftovers in an airtight container at room temperature. This keeps them fresh and chewy for about 3 to 4 days. I recommend layering them with parchment paper between treats if stacking to prevent sticking and maintain the decorations on top. Avoid refrigeration unless it’s very warm where you live, as this can cause the texture to become hard.
Freezing
You can freeze these treats if you want to save them for later or prepare them ahead of time. I wrap each pumpkin individually in plastic wrap, then place them in a freezer-safe container or zip-top bag. They keep well frozen for up to 2 months. When you're ready to enjoy them, just thaw at room temperature for a couple of hours before serving to restore their nice chewy consistency and keep those decorations looking fresh.
Reheating
I generally don’t recommend reheating Pumpkin Rice Krispie Treats because they are best enjoyed at room temperature to preserve their texture. However, if you’d like them a bit warmed up, you can pop one in the microwave for 5 to 7 seconds—just enough to feel soft without melting the decorations or making it soggy. Avoid overheating or baking as it alters the crunchy-chewy balance that makes these treats so enjoyable.
FAQs
Can I use regular-sized marshmallows instead of mini marshmallows?
Absolutely! If you only have regular marshmallows on hand, simply use the same total volume—the mini ones just melt a bit faster, but regular marshmallows will work just fine when melted carefully over the stove.
What if I don’t have orange food coloring? Can I skip it?
You can skip the orange food coloring if you prefer, but it’s what really gives the Rice Krispie treats that festive pumpkin look. Alternatively, you could use a natural coloring option like a small amount of pumpkin puree mixed into the melted marshmallows, though this will slightly change texture and flavor.
How do I prevent the treats from sticking to my hands while shaping?
Coating your hands lightly with cooking oil or spraying them with nonstick spray is the secret! This makes it much easier to roll the mixture into balls without it sticking or tearing, ensuring smooth, round pumpkins every time.
Can I make this recipe gluten-free?
Yes, simply use a gluten-free cereal brand that has crisp rice as the main ingredient. Make sure to check the marshmallows and other ingredients for gluten as well, but most standard marshmallows and food coloring are gluten-free.
Are these treats kid-friendly to make and eat?
Definitely! Kids love helping roll the pumpkin shapes and decorate with icing. The ingredients are straightforward, and because the treats don’t require baking, it’s a safe and fun activity for family bonding during the fall season.
Conclusion
If you’re looking to add a touch of whimsy and seasonal cheer to your sweet treats, I wholeheartedly encourage you to try this Pumpkin Rice Krispie Treats Recipe. It’s easy, fun, and absolutely irresistible whether you’re making it for a cozy family night or a lively fall party. I promise these little pumpkins will bring smiles all around and become a beloved tradition as you share them with those you care about.
PrintPumpkin Rice Krispie Treats Recipe
These Pumpkin Rice Krispie Treats are a festive and fun twist on the classic gooey snack, perfect for Halloween or autumn celebrations. Made with melted marshmallows tinted orange and shaped into pumpkins, decorated with green icing vines and Tootsie Roll stems, and finished with jack-o-lantern faces piped in black icing, these treats are both visually delightful and deliciously nostalgic.
- Prep Time: 15 minutes
- Cook Time: 10 minutes
- Total Time: 25 minutes
- Yield: 6 servings
- Category: Dessert
- Method: Stovetop
- Cuisine: American
Ingredients
Main Ingredients
- ¼ cup salted butter
- 4 cups mini marshmallows
- 1 teaspoon vanilla extract
- 5 cups Rice Krispies cereal
- 5-10 drops orange food coloring
Decorations
- ½ cup green icing
- 5 small Tootsie Rolls
- ¼ cup black icing
Instructions
- Melt Butter: In a large saucepan over medium heat, melt the salted butter completely before moving to the next step.
- Combine Marshmallows and Vanilla: Stir in mini marshmallows and vanilla extract using a wooden spoon. Keep stirring frequently until the marshmallows have fully melted into a smooth mixture.
- Add Food Coloring: Add 5 drops of orange food coloring initially, then add more until you reach your desired shade of orange. Stir continuously for an additional two minutes to evenly incorporate the coloring and ensure all marshmallows are melted.
- Mix in Cereal: Remove the pan from heat and add the Rice Krispies cereal. Toss thoroughly to coat the cereal evenly with the orange marshmallow mixture. Let the mixture cool slightly off the stove before shaping.
- Shape the Pumpkins: Lightly coat your hands with cooking oil or spray to prevent sticking. Roll the cereal mixture into 5-6 balls about 4 inches in diameter. Place them onto parchment or wax paper. Flatten the tops gently and create vertical grooves on each ball using a butter knife to mimic pumpkin ridges. Set aside to cool and set completely.
- Decorate: Once cooled, use a small amount of green icing to attach a small Tootsie Roll on top of each pumpkin as the stem. Fill a piping bag with the remaining green icing and pipe swirling vines and loops around the stems. Then pipe jack-o-lantern faces on some or all of the pumpkins using black icing in a piping bag.
- Set and Serve: Allow the decorated treats to sit for 5 minutes so the icing can harden slightly before serving.
Notes
- To prevent sticking when shaping the treats, lightly oil your hands or use cooking spray.
- Adjust orange food coloring gradually to achieve the perfect pumpkin color without over-saturating.
- You can substitute Tootsie Rolls with small candies or pretzel sticks for pumpkin stems.
- These treats are best enjoyed fresh but can be stored in an airtight container for up to 2 days.
- Use parchment or wax paper to avoid sticking during cooling.




Leave a Reply