
I absolutely love sharing this Graveyard Brownies Recipe with friends and family because it combines a rich, fudgy brownie base with fun, spooky decorations that are perfect for Halloween or any creepy-themed celebration. It’s one of those recipes that’s incredibly easy to prepare, but brings so much character and excitement to the table. The taste is classic chocolatey goodness with a playful twist that’s sure to get everyone talking—and eating more than one, too!
Why You'll Love This Graveyard Brownies Recipe
What really makes this recipe special to me is the perfect balance between the deep, indulgent chocolate flavors of the brownies and the fun gravestone decorations that bring the whole thing to life. The Milano cookies, iced with “RIP,” add a delicate crunch and a charming visual that makes these brownies stand out at any gathering. Every bite is deliciously moist and chocolaty, but with a playful Halloween vibe that’s sure to make you smile.
I also love how easy this Graveyard Brownies Recipe is to make. You’re working with a simple boxed brownie mix, so the prep time is minimal, but the final product feels homemade and festive. It’s perfect for last-minute parties, spooky celebrations, or even as a fun weekend treat with the family. Trust me, you don’t have to be a seasoned baker to pull this off, and you’ll feel so proud presenting these on your dessert table!
Ingredients You'll Need
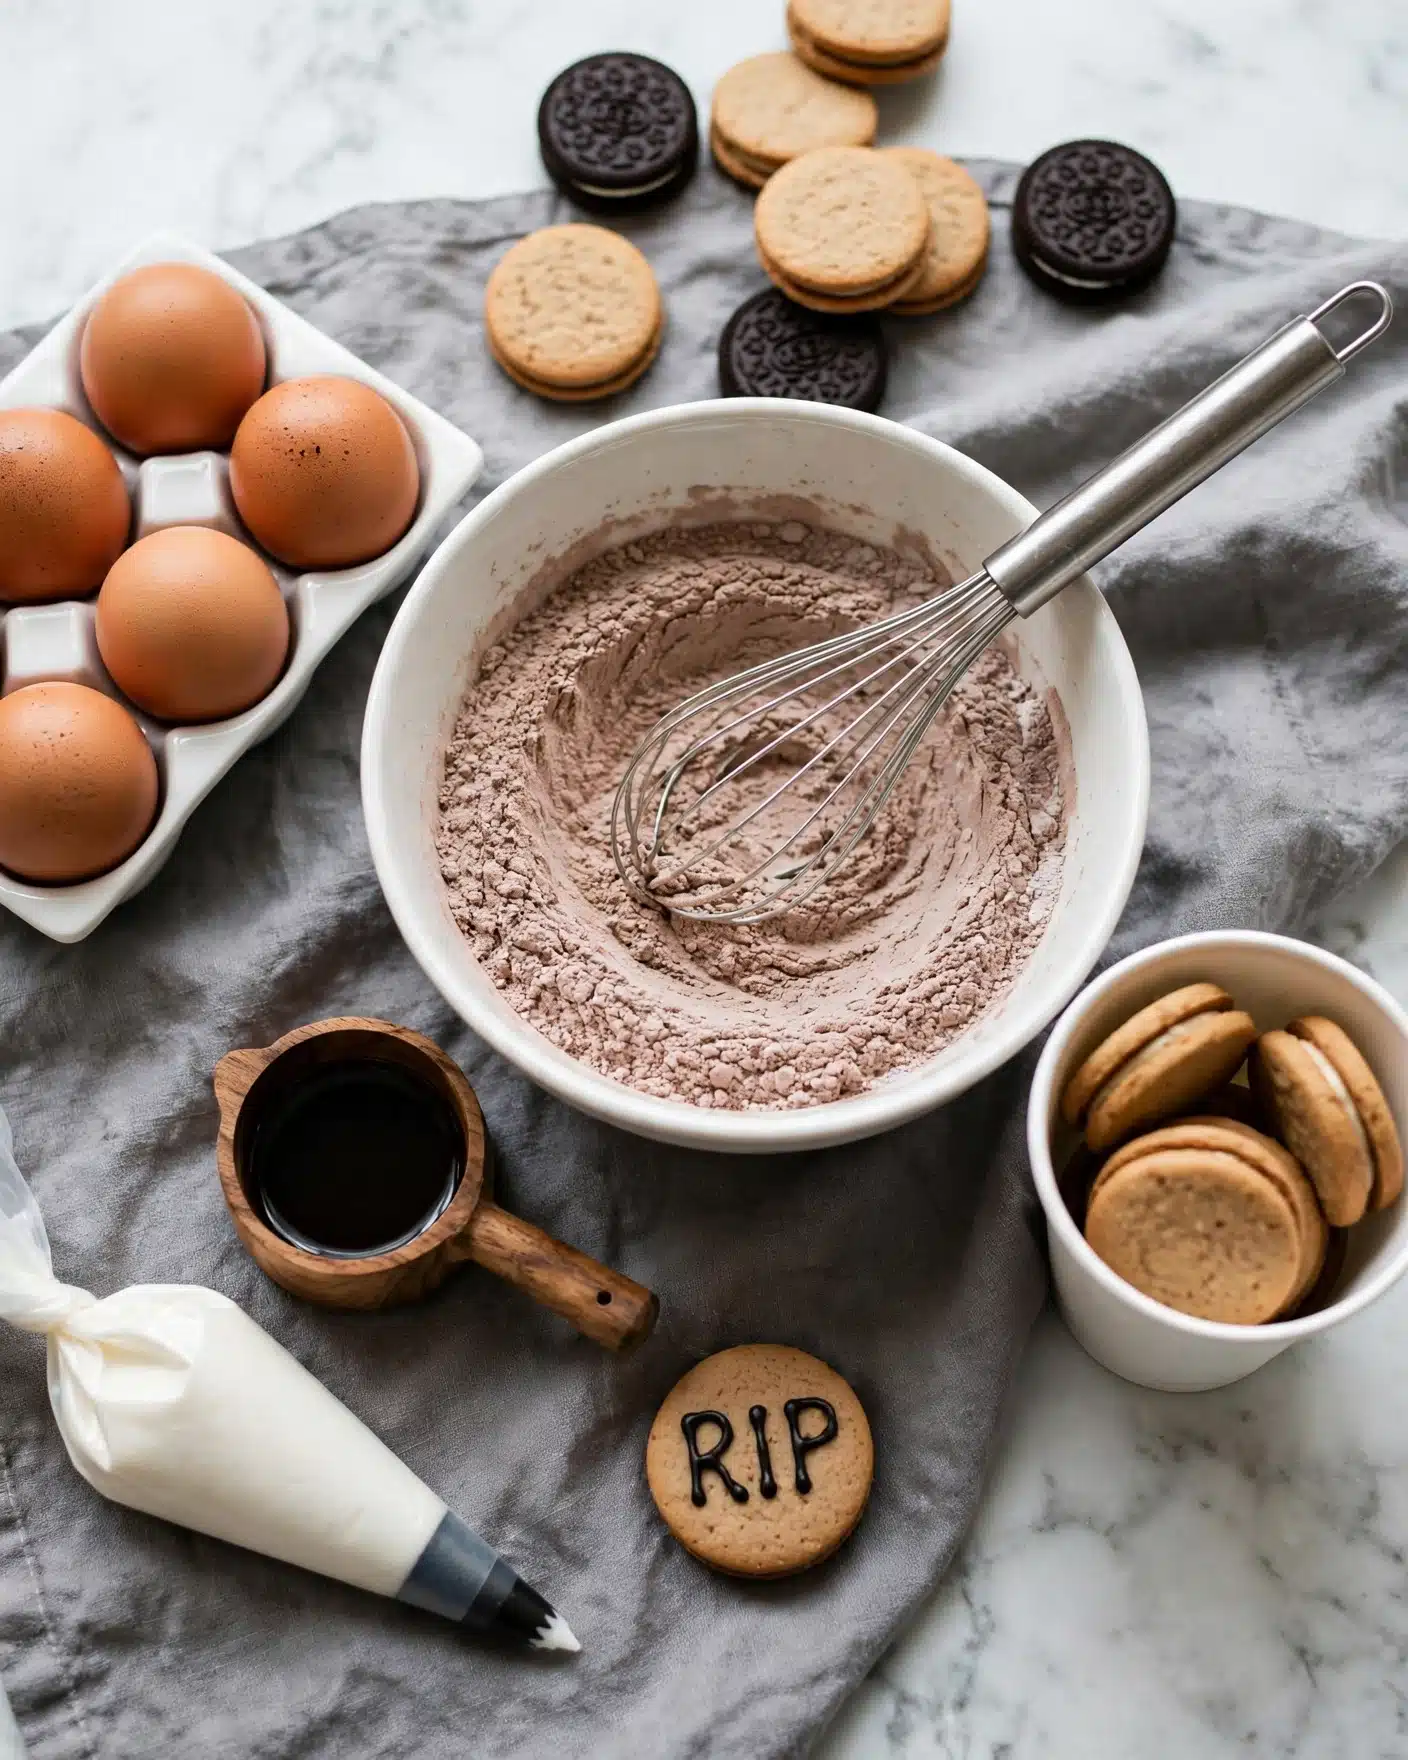
The ingredients for this recipe are delightfully simple but incredibly important to get the right texture, flavor, and spooky look. Each one contributes something unique—from the brownie mix that provides that fudgy base, to the Milano and Oreo cookies that transform the dessert into a graveyard scene.
- Brownie mix: The base of this recipe, providing a rich and fudgy chocolate flavor with minimal prep effort.
- Eggs, olive oil, and water: Simple pantry staples needed to prepare the brownie batter just right.
- Milano cookies: Perfectly sized “headstones” to decorate your brownies with a sophisticated crunch.
- Black decorating icing/gel: Used to write “RIP” on the Milano cookies for that spooky graveyard effect.
- Oreo cookies (filling removed): Crushed to resemble dirt, adding texture and authentic graveyard vibes.
- Non-stick cooking spray: Ensures your brownies come out of the pan cleanly for perfect slices.
Directions
Step 1: Preheat your oven to the temperature indicated on the brownie mix package—usually around 325 to 350°F. This gets everything ready to bake your brownies to fudgy perfection.
Step 2: Prepare the brownie batter according to the package directions. This usually means mixing the brownie mix with eggs, olive oil, and water until it’s smooth and lump-free.
Step 3: Lightly coat an 8 x 8-inch baking dish with non-stick cooking spray. This little step helps the brownies come out cleanly when baked and cooled.
Step 4: Pour the brownie batter into the pan, then use a spatula to level the surface evenly. Bake it for the time specified on the package, usually around 25 to 30 minutes, or until a toothpick inserted near the center comes out with moist crumbs but no wet batter.
Step 5: While the brownies are baking, take your Milano cookies and use the black decorating icing or gel to write “RIP” on each cookie. Place them somewhere to set so that the icing hardens a bit and doesn’t smudge during assembly.
Step 6: Next, remove the filling from your Oreo cookies, then place the cookie pieces in a sealed bag and crush them with a rolling pin until they resemble fine crumbs. These will act as the “dirt” on top of your graveyard brownies.
Step 7: Once the brownies are fully baked, allow them to cool completely in the baking dish. This cooling time is key, so the brownies hold their shape when cut.
Step 8: Cut the cooled brownies into 12 equal rectangles—4 rows of 3 pieces each work perfectly.
Step 9: Carefully insert each Milano cookie vertically into the top of each brownie piece, just like a gravestone. Finally, use a teaspoon to sprinkle the crushed Oreo crumbs generously on top of each brownie to mimic earth and add texture.
Servings and Timing
This Graveyard Brownies Recipe yields 12 generous servings, making it perfect for a small party or family gathering. The prep time is very manageable—about 10 minutes to get everything mixed and the cookies decorated, plus 25 to 30 minutes bake time. Be sure to allow at least 15 minutes for the brownies to cool completely before cutting and decorating. Altogether, you’re looking at roughly 45 minutes from start to finish, making it a quick but impressive dessert option!
How to Serve This Graveyard Brownies Recipe
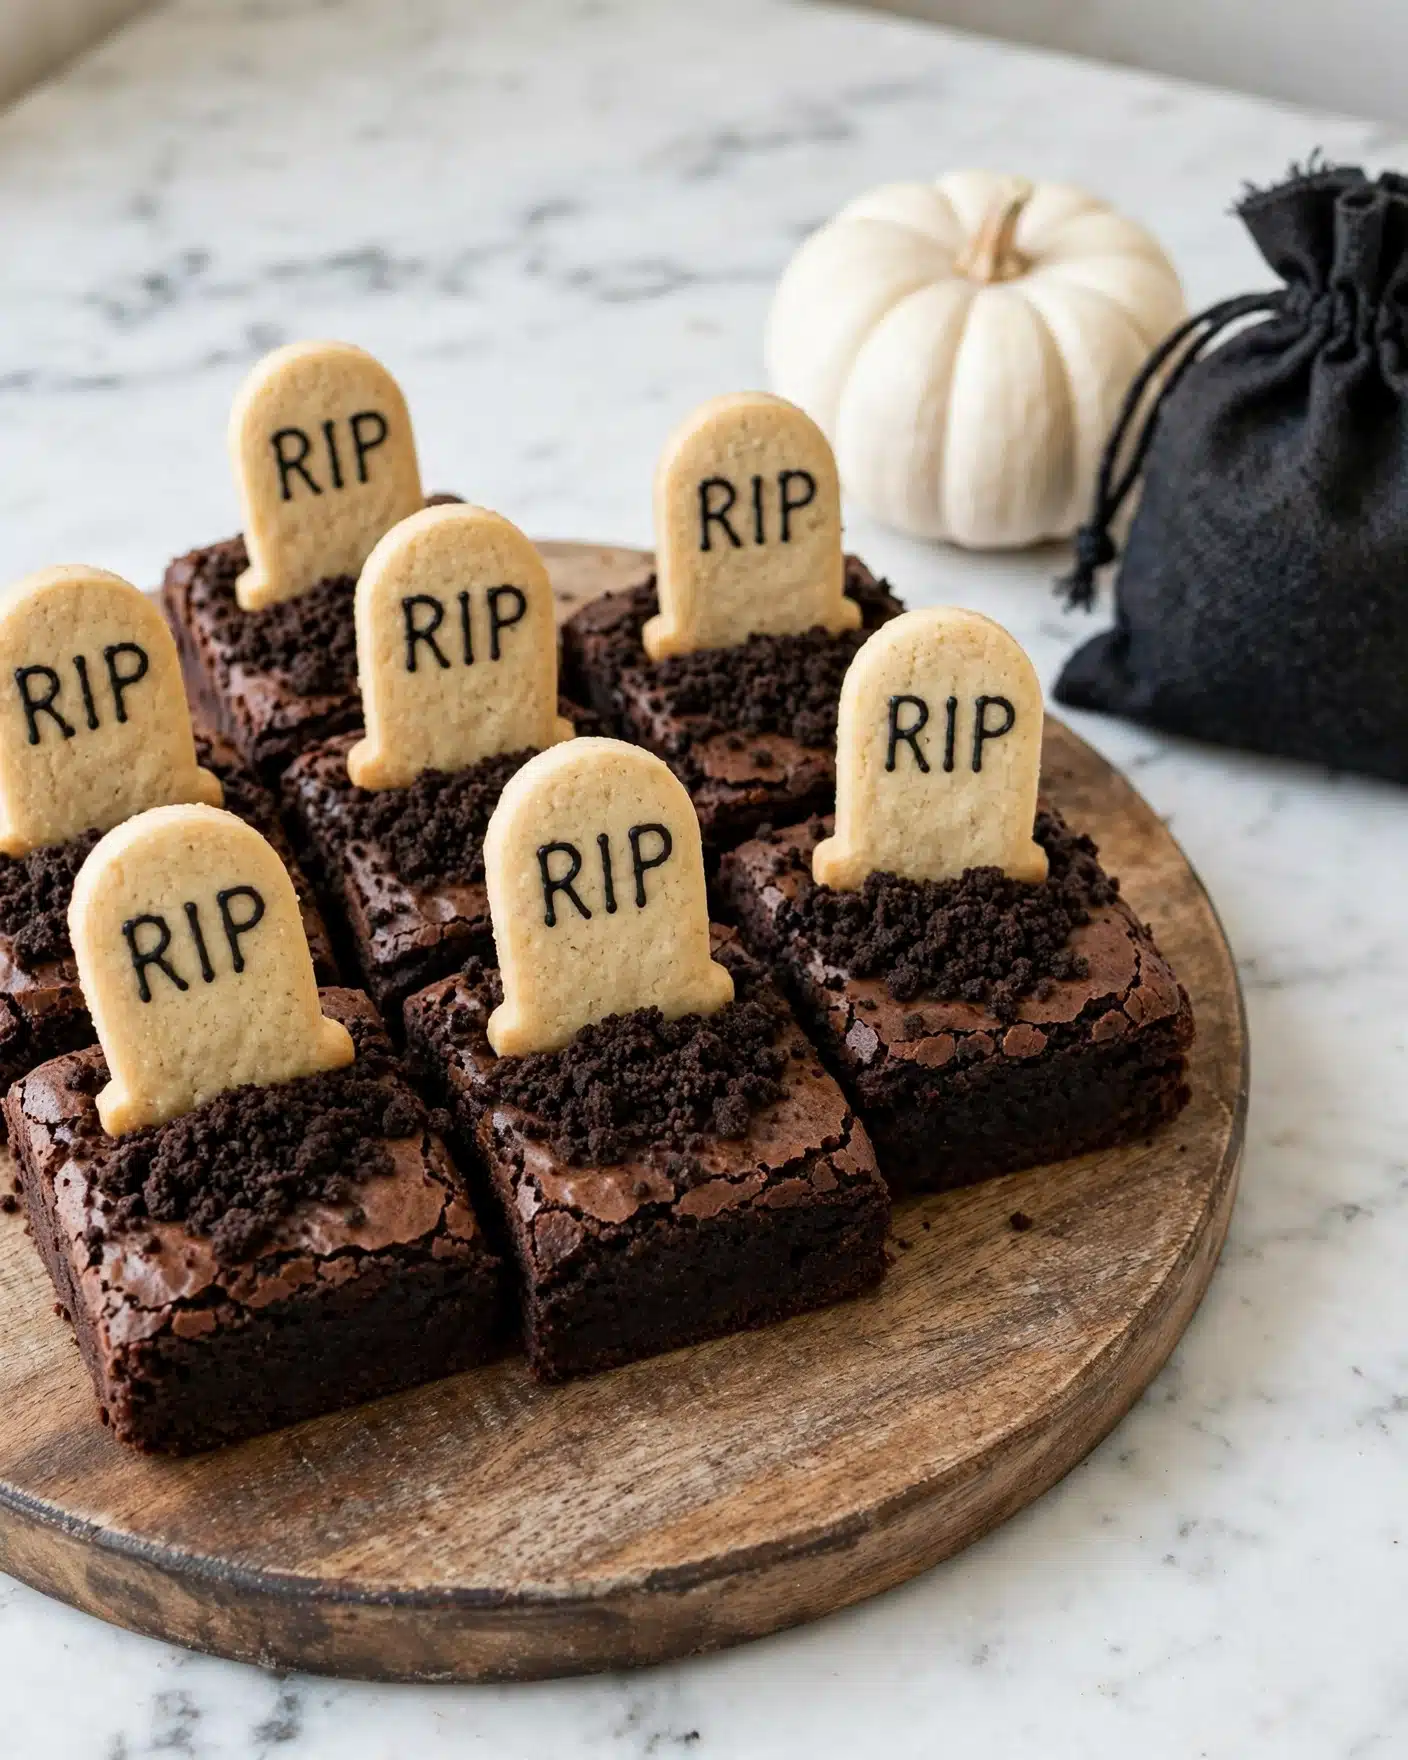
I love serving these Graveyard Brownies at Halloween parties or any spooky get-together where the presentation can be just as fun as the flavor itself. They look amazing on a dark or rustic-style platter, which enhances the “graveyard” aesthetic. To elevate the theme, I sometimes scatter a few edible fake spiders or plastic skeleton decorations around the tray for extra creep factor.
The crushed Oreo dirt and Milano tombstones make for a striking contrast with the rich, dark chocolate brownies, so I recommend serving them at room temperature. Warm brownies might cause the cookie tombstones to soften too much, and chilling them can make the texture a little firm. Room temperature is the sweet spot for the best balance of fudginess and crunch.
As for accompaniments, these brownies are delightful with a cold glass of milk or a hot cup of coffee or tea to balance the sweetness. I’ve also seen them served alongside some fresh berries or a scoop of vanilla ice cream if you want to add a creamy contrast. These treats work beautifully as a fun weeknight dessert, at school parties, or even as a conversation-starting dish at holiday events!
Variations
If you want to customize this Graveyard Brownies Recipe, there are plenty of ways to do so while still maintaining the spooky theme. For example, if you prefer a gluten-free version, you can swap the traditional brownie mix for a gluten-free boxed mix or make brownies from scratch using gluten-free flour. Just be sure to check your cookies for compatibility or swap in gluten-free cookie options for the tombstones and dirt.
For a vegan twist, you can use a dairy-free and egg-free brownie mix or a homemade vegan brownie recipe. Substitute eggs with flax eggs or applesauce, and choose vegan Milano-style cookies or another similar cookie to decorate. For the black icing, there are vegan decorating gels available, or you can make a simple black icing at home using powdered sugar and natural food coloring.
Flavor-wise, I’ve experimented with adding a teaspoon of cinnamon or a pinch of espresso powder to the brownie batter for a subtle depth of flavor that really enhances the chocolate. You could also try decorating with white icing for “ghostly” grave markers or mix in some chocolate chips or nuts for added texture in your brownies. Another fun method is baking in muffin tins to make individual graveyard brownie “cupcakes” that are perfect for portion control and easy serving.
Storage and Reheating
Storing Leftovers
If you happen to have leftover Graveyard Brownies (though that rarely lasts long!), store them in an airtight container at room temperature to keep their fudgy texture intact. I find that covering them with plastic wrap or placing parchment paper between layers helps prevent the Oreo crumbs from getting too soggy or sticking. Leftovers keep well for up to 3 days this way, so they’re perfect for sharing or enjoying over a couple of days.
Freezing
These brownies freeze beautifully if you want to prep ahead or save some for later. I recommend freezing them before adding the Milano tombstones and Oreo crumbs to prevent crushing during storage. Wrap each brownie tightly in plastic wrap, then place them all into a large freezer-safe bag or container. They can be frozen for up to 3 months. When you’re ready to serve, thaw at room temperature and then add the decorations fresh for the best look and texture.
Reheating
To enjoy warm brownies, gently reheat individual pieces in the microwave for about 10 to 15 seconds—just enough to soften but not melt the cookies or icing. Avoid reheating the whole pan in the oven if you want to preserve the delicate decorations. If you stored brownies with the toppings already in place, warming should be minimal to keep the design intact. Room temperature serving is often best to enjoy the full experience!
FAQs
Can I make the brownies from scratch instead of using a mix?
Absolutely! While I love the convenience of a boxed brownie mix for this recipe, you can use your favorite homemade brownie recipe instead. Just bake them in an 8 x 8-inch pan and allow them to cool fully before decorating. The creativity with your own brownie recipe can add a personalized touch to the Graveyard Brownies.
What if I can’t find Milano cookies for the tombstones?
If Milano cookies aren’t available, you can use other oval or rectangular cookies that have a similar texture and size. Shortbread cookies, graham crackers cut into shape, or even rectangular wafer cookies work well. Just make sure they’re sturdy enough to stand upright on the brownies.
How do I ensure the “RIP” on the cookies doesn’t smudge?
To keep the black icing from smearing, write the “RIP” on the cookies well in advance and let them dry completely at room temperature. Some people refrigerate the decorated cookies briefly to help set the icing, but avoid handling them too much. Delicate, slow drying is key for clear, crisp letters.
Can I make this recipe ahead of time for a party?
Definitely! You can bake the brownies and prep the Oreo crumbs a day or two ahead, and even write “RIP” on the Milano cookies in advance. Assemble just before serving for the freshest look and texture. This recipe is forgiving and convenient for party planning.
Is there a way to make these brownies less sweet?
If you want to tone down the sweetness, consider using a brownie mix that is less sugary or using semi-sweet chocolate chips in your homemade brownie recipe. Additionally, avoiding extra sugar in the decorating icing or choosing cookies that are not overly sweet can balance the flavors. Serving with unsweetened coffee or tea also helps cut through the sugary richness.
Conclusion
I really hope you’ll give this Graveyard Brownies Recipe a try—it’s such a fun and delicious way to add a little spooky magic to your dessert table. Whether it’s for Halloween, a themed party, or just because you want a sweet treat that brings smiles, these brownies never disappoint. I promise the combination of easy prep, playful decorations, and rich chocolate flavor will have you making them again and again. Happy baking!
PrintGraveyard Brownies Recipe

Graveyard Brownies are a fun and spooky dessert perfect for Halloween or any themed party. These brownies are decorated with Milano cookies inscribed with RIP in black icing and Oreo cookie crumbs to mimic graveyard dirt, creating a playful spooky scene that's both delicious and visually appealing.
- Prep Time: 10 minutes
- Cook Time: 35 minutes
- Total Time: 45 minutes
- Yield: 12 servings
- Category: Dessert
- Method: Baking
- Cuisine: American
Ingredients
Brownie Base
- 1 package brownie mix
- 2 eggs (as required by the brownie mix)
- Olive oil (quantity as required by the brownie mix)
- Water (quantity as required by the brownie mix)
Decorations
- 12 Milano cookies
- Black decorating icing/gel (in a tube)
- 5 Oreo cookies (filling removed)
- Non-stick cooking spray (for preparing the pan)
Instructions
- Preheat oven: Preheat your oven to the temperature specified on the brownie mix package to ensure proper baking.
- Prepare brownie batter: Follow the package instructions to combine the brownie mix with eggs, olive oil, and water to create the batter.
- Prepare baking dish: Lightly coat an 8 x 8 inch baking dish with non-stick cooking spray to prevent sticking.
- Bake brownies: Pour the prepared brownie batter into the dish and smooth the surface evenly with a spatula. Bake according to the package directions until set.
- Decorate Milano cookies: While the brownies bake, use the black decorating icing or gel to write "RIP" on each Milano cookie to resemble tombstones. Let the icing set completely.
- Prepare Oreo crumbs: Remove the filling from the Oreo cookies, place the cookies in a bag, and crush them using a rolling pin until crumb-sized.
- Cool and cut brownies: Allow the baked brownies to cool completely so they can be cut cleanly. Cut into 12 equal rectangles (4 rows by 3 columns).
- Assemble graveyard scene: Carefully insert one decorated Milano cookie into the top of each brownie piece to serve as a headstone. Using a teaspoon, sprinkle Oreo cookie crumbs on top of each brownie to mimic dirt around the gravehead.
Notes
- Make sure the brownies are completely cooled before cutting and decorating to avoid breaking.
- You can use different cookie types or decorative icing colors to customize the theme.
- If you prefer, substitute olive oil with vegetable oil as per brownie mix instructions.
- Ensure to remove Oreo filling thoroughly to get a clean crumb topping effect.
- Use a gentle hand when inserting Milano cookies so brownies don't crumble.




Leave a Reply