
I absolutely love making treats that bring a festive vibe and comfort all at once, which is exactly why I’m so excited to share my take on this Homemade Caramel Apples Recipe. These apples are wonderfully crisp and tart on the inside, perfectly coated in a silky, buttery caramel that’s just the right amount of sweet. They’re not only fun to make but also bring a nostalgic joy that reminds me of fairs and family gatherings. Every bite hits that ideal combination of creamy, crunchy, and fruity, and I can’t wait for you to experience it!
Why You'll Love This Homemade Caramel Apples Recipe
What really makes this Homemade Caramel Apples Recipe stand out for me is how the balance of flavors and textures is spot on. The Granny Smith apples bring that refreshing tartness that cuts through the richness of the caramel, creating a perfect harmony with every bite. I love that the caramel itself is smooth and buttery with a subtle hint of vanilla, which makes it irresistibly delicious without feeling over-sweetened. It’s like a sweet hug for your taste buds!
On top of that, the process is surprisingly simple. I appreciate recipes that don't require hours in the kitchen or complicated steps but still deliver impressive results. Once you get the caramel just right with the candy thermometer, dipping the apples is actually quite fun, especially if you add your own creative toppings like crushed pretzels or mini M&M’s. Honestly, this recipe is my go-to for holidays, birthday parties, or even just an indulgent weekend treat because it’s easy to make, shares well, and always feels special.
Ingredients You'll Need
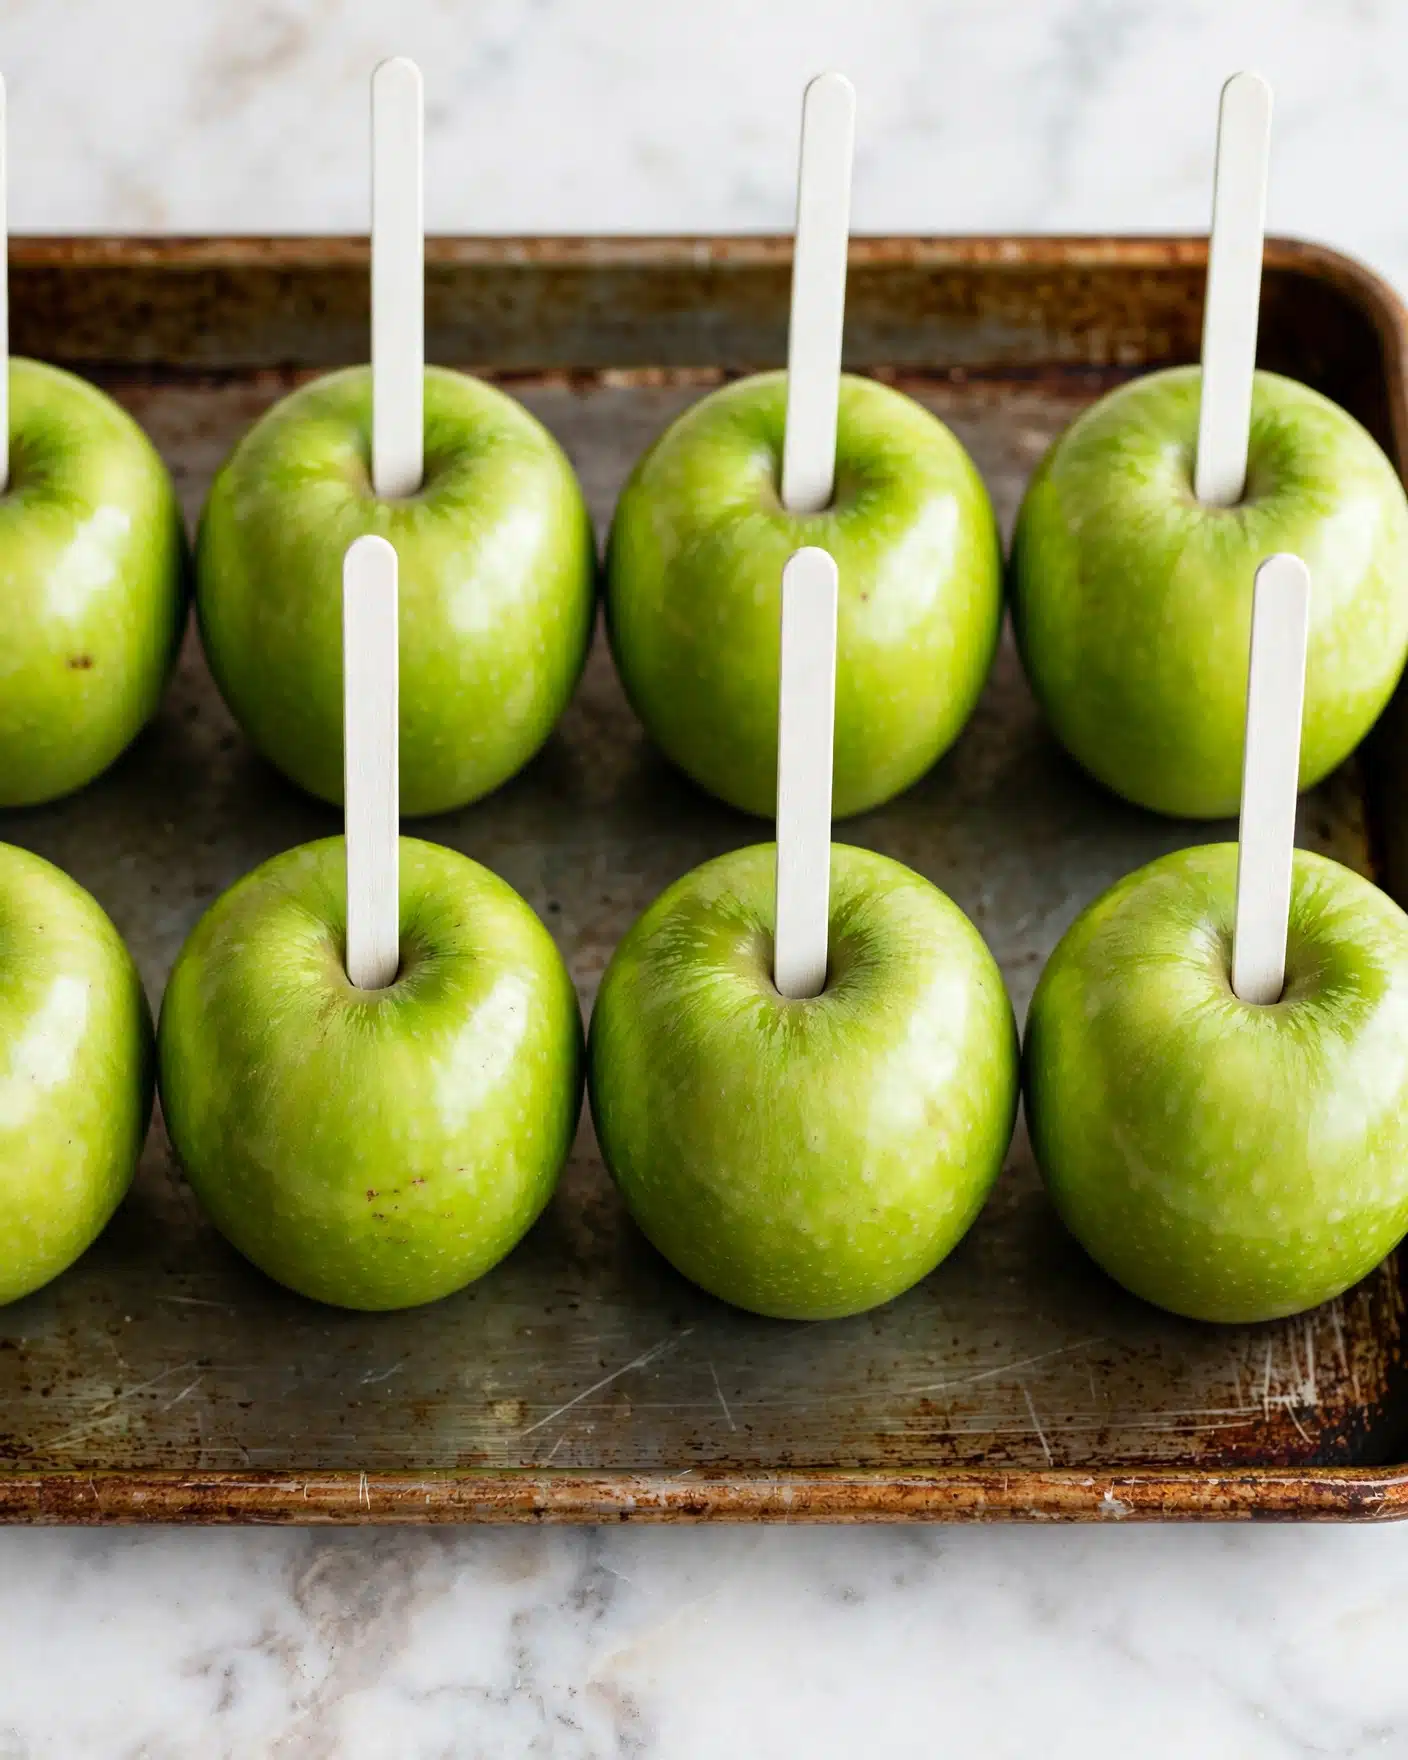
The beauty of this Homemade Caramel Apples Recipe is in its simplicity. Each ingredient plays a crucial role in creating that luscious caramel coating and crunchy, juicy apple foundation. You'll find the recipe uses familiar items, yet combined thoughtfully to create a deliciously balanced treat that’s as beautiful to look at as it is to eat.
- Granny Smith apples: Their tartness is perfect for balancing the sweet, creamy caramel coating.
- Salted butter: Adds richness and depth to the caramel while enhancing flavor.
- Light brown sugar: Provides a molasses note that makes the caramel complex and delicious.
- Light corn syrup: Keeps the caramel smooth and prevents crystallization for that perfect texture.
- Sweetened condensed milk: Offers creamy sweetness and thickness that makes the coating luscious.
- Vanilla extract: Adds warmth and rounds out the caramel flavor.
- Various toppings like crushed pretzels, chopped nuts, or candy melts: Great for adding texture, flavor boosts, and a fun personal touch.
Directions
Step 1: Start by lining a baking sheet with parchment paper to keep things tidy and make cleanup a breeze. Wash the apples really well to remove any waxy coating—this helps the caramel stick better. Completely dry them, then carefully insert a tongue depressor deep into the top of each apple to form a sturdy handle. Place the apples on the parchment-lined sheet, then pop them into the freezer for about 20 minutes while you prepare your caramel.
Step 2: In a medium saucepan over medium-high heat, melt the salted butter. Once melted, stir in the brown sugar, corn syrup, and sweetened condensed milk using a wooden spoon. Keep stirring constantly—it’s crucial not to let the caramel stick or burn. Cook this mixture until it reaches the soft ball stage, between 235 and 240 degrees Fahrenheit on a candy thermometer, which should take around 12 to 15 minutes.
Step 3: As soon as your caramel hits the right temperature, take the saucepan off the heat and stir in the vanilla extract immediately. It’s normal to see some bubbling here, so don’t worry—just stir until it’s fully combined. This step really brings out a beautiful depth of flavor.
Step 4: Remove your chilled apples from the freezer and dip each one, one at a time, into the warm caramel, allowing the excess to drip off before holding them upside down for about 20 seconds. This waiting time helps the coating set a bit on the cold apple, making your caramel layer nice and even. Turn the apples upright and place them on your prepared parchment paper. Once all apples are dipped, transfer the whole tray to the fridge for about 15 minutes to set completely.
Step 5: If you want to get creative and go beyond the classic look, now’s the perfect time to add toppings! Right after dipping but before the caramel fully sets, roll your apples in chosen toppings like toasted coconut, crunchy nuts, or candy pieces to add texture and extra flavor. This is my favorite part because it’s so fun to mix and match.
Step 6: After the caramel is fully set, you can wrap your apples loosely in cellophane and tie them with a ribbon for a charming homemade gift that everyone will love. They store beautifully and make delightful presents for any occasion.
Servings and Timing
This Homemade Caramel Apples Recipe makes about 10 servings, perfect for sharing with family, friends, or coworkers. Prep time is roughly 10 minutes, which mostly involves preparing the apples and getting your ingredients ready. Cooking the caramel takes about 15 minutes, and then you’ll need an additional 35 minutes for chilling both in the freezer and fridge. Overall, expect about 30 to 40 minutes of active time and an hour total including chilling. The timing strikes a great balance between preparation and the anticipation of enjoying these treats!
How to Serve This Homemade Caramel Apples Recipe
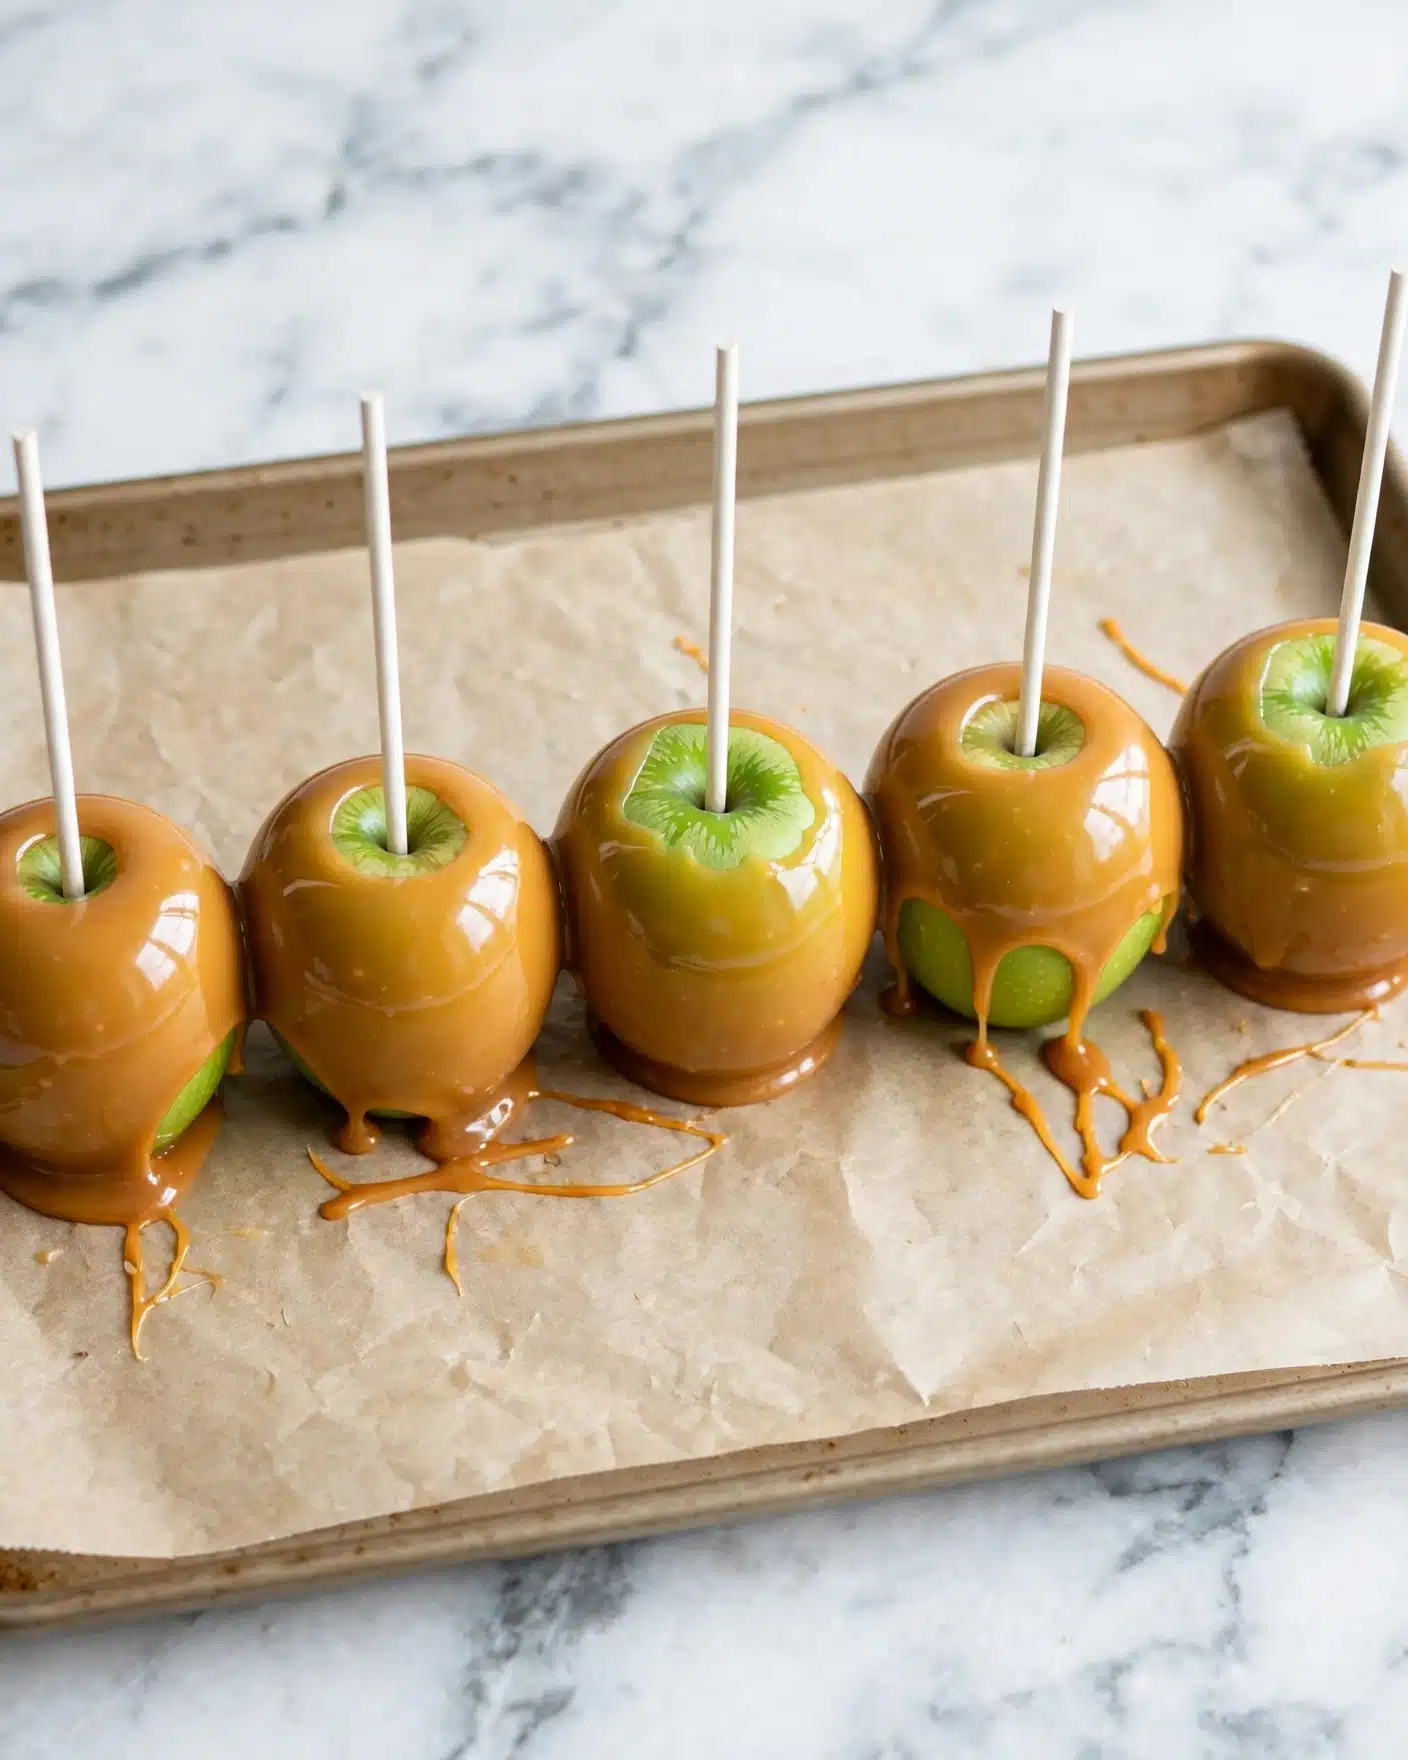
When it comes to serving these caramel apples, I like to keep things relaxed and fun. They’re fantastic just as they are, but if you want to turn it into a party moment, try placing your caramel apples on a decorative platter surrounded by small bowls of complementary toppings—think tiny nuts, more candy pieces, or even a sprinkling of cinnamon sugar for that extra cozy touch. It makes for a colorful display that invites everyone to indulge and personalize their treat.
I also love pairing these apples with a warm, spiced apple cider or a rich hot chocolate, which enhances the autumnal vibe and creates a cozy experience. The blend of the crisp, chilled apple with the warm drink is pure magic in my book. If serving for kids or family gatherings, portion size feels just right—one apple per person is a satisfying dessert that’s not too overwhelming but still feels indulgent.
For a bit of presentation flair, I often suggest adding a drizzle of melted white chocolate or dark chocolate over the top of the caramel once set, using a spoon or piping bag. It adds visual appeal and another layer of flavor. These apples are best served chilled or at room temperature—cold enough for the caramel to have a nice snap but not too cold to dull the flavors.
Variations
I love switching things up with this Homemade Caramel Apples Recipe to keep it fresh and cater to different tastes. If you prefer a less sweet version, you can reduce the amount of brown sugar slightly or try using coconut sugar for a deeper, earthier sweetness. For a vegan twist, I’ve experimented with replacing the butter and sweetened condensed milk with coconut oil and a homemade vegan condensed milk alternative—results are delightful though a bit different in texture.
Flavor-wise, you can infuse the caramel with a sprinkle of cinnamon or a pinch of sea salt to add a gourmet touch. The variety of toppings is where you can get really creative—from chopped nuts, graham cracker crumbs, marshmallows, to crushed candy bars like Butterfingers or mini Reese’s peanut butter cups—the possibilities are endless and delicious. Sometimes I even toast the coconut or nuts beforehand for an extra boost of flavor and crunch.
If you want a quicker version, instead of making caramel from scratch, using good-quality store-bought caramel sauce works fine for dipping, but homemade always wins in taste for me. Alternatively, you can bake the apples first if you want a softer texture inside while keeping that crisp caramel exterior, creating a warm cozy treat.
Storage and Reheating
Storing Leftovers
Once you’ve made your homemade caramel apples, storing them properly is important to maintain that perfect texture. I recommend placing leftover apples in an airtight container or loosely wrapped in plastic wrap and keeping them in the refrigerator. They usually keep well for up to 3 days without any loss of flavor or texture. Just be sure to keep them separate from other foods that might transfer moisture or odors, as the caramel can become sticky if exposed.
Freezing
I generally don't freeze caramel apples because the caramel coating can change texture and become less appealing once thawed. Freezing often causes the caramel to get tough and the apples to become mushy after defrosting. For best enjoyment, I prefer to make only what I can eat fresh or give away as gifts before the apples start to deteriorate.
Reheating
When it comes to reheating, I usually avoid heating caramel apples since the caramel is best enjoyed set and cold or at room temperature. However, if you want to soften the caramel slightly for eating, letting the apples sit at room temperature for 10-15 minutes does the trick beautifully. Avoid microwaving because uneven heating can cause the caramel to melt unevenly and turn overly sticky or gooey.
FAQs
Can I use different types of apples for this recipe?
Absolutely! While I love Granny Smith apples for their tartness and firmness, you can experiment with Fuji, Honeycrisp, or Gala apples depending on your sweetness preference. Just keep in mind that softer apples may alter the texture and how well the caramel sticks.
Do I need a candy thermometer to make the caramel?
Using a candy thermometer is highly recommended because precise temperature control ensures your caramel reaches the perfect stage without burning or being too soft. It takes the guesswork out, making the process less stressful and more foolproof.
What are some fun toppings to try on caramel apples?
Some of my favorites include crushed pretzels for saltiness, toasted coconut for tropical flair, chopped nuts for crunch, and fun candy pieces like mini M&M’s or mini Reese’s cups to add color and flavor. You can even drizzle melted chocolate over the caramel for a decadent touch.
Can I make these gluten-free or vegan?
Yes, they can be adapted! Use gluten-free toppings and ensure your ingredients, like the corn syrup, are certified gluten-free if necessary. For a vegan version, substitute butter with vegan margarine or coconut oil and use a vegan sweetened condensed milk alternative. The flavor will be slightly different but still delicious.
How long can I keep homemade caramel apples before they spoil?
Properly refrigerated, caramel apples will stay fresh for about 3 days. After that, the apples may lose their crispness and the caramel can become sticky. It’s best to enjoy them fresh or gift them within that window to savor the optimal taste and texture.
Conclusion
I really hope this Homemade Caramel Apples Recipe inspires you to create a fun, delicious treat that brings a little extra joy to your day. Making these apples is such a satisfying process, and the results never fail to impress anyone lucky enough to try them. Whether for a festive occasion or just a special indulgence, I know you’ll love the blend of crisp apples and buttery caramel as much as I do. Go ahead, grab those apples and get dipping—you won’t regret it!
PrintHomemade Caramel Apples Recipe

This Homemade Caramel Apples recipe offers a deliciously sweet and tangy treat made by dipping crisp Granny Smith apples into a rich, homemade caramel sauce. Perfectly set with various toppings, these caramel apples make a fun dessert or festive gift for any occasion.
- Prep Time: 15 minutes
- Cook Time: 15 minutes
- Total Time: 30 minutes
- Yield: 10-15 servings
- Category: Dessert
- Method: Stovetop
- Cuisine: American
Ingredients
Apples
- 10-15 Granny Smith apples
Caramel
- 1 cup salted butter
- 2 cups light brown sugar
- 1 cup light corn syrup
- 14 ounces sweetened condensed milk
- 1 teaspoon vanilla extract
Toppings (Optional)
- White candy melts
- Cinnamon-sugar
- Crushed pretzels
- Chopped pecans
- Chopped peanuts
- Mini M&M's
- Crushed Oreos
- Toasted coconut
- Melted dark, milk, or white chocolate
- Chopped mini Reese's peanut butter cups
- Chopped Butterfingers
- Graham cracker crumbs
- Marshmallows
Instructions
- Prepare the Apples: Line a baking sheet with parchment paper. Wash the Granny Smith apples thoroughly to remove waxy residue, then dry completely. Insert a tongue depressor firmly into the top of each apple to hold them securely. Place the skewered apples on the baking sheet and freeze for 20 minutes to chill while preparing the caramel.
- Make the Caramel: In a medium saucepan over medium-high heat, melt the salted butter. Stir in the light brown sugar, light corn syrup, and sweetened condensed milk using a wooden spoon. Cook the mixture, stirring almost constantly, until it reaches 235-240°F on a candy thermometer (approximately 12-15 minutes). Be careful to avoid burning the caramel by stirring continuously.
- Add Vanilla: Remove the saucepan from heat and immediately stir in the vanilla extract. The caramel may bubble when the vanilla is added; continue stirring until smooth and well combined.
- Dip Apples in Caramel: Retrieve the chilled apples from the freezer. Dip each apple into the hot caramel, letting excess caramel drip off. Quickly flip the apple upside down for about 20 seconds to allow the caramel to set on the cold surface before placing it right-side up on the parchment-lined baking sheet. Repeat for all apples.
- Apply Toppings (Optional): Before the caramel sets completely, roll or sprinkle the caramel-coated apples with desired toppings such as crushed pretzels, nuts, candy, or chocolate for extra flavor and texture.
- Set the Caramel Apples: Transfer the dipped apples to the refrigerator for 15 minutes to allow the caramel to fully firm up.
- Wrap and Store: Once set, wrap the caramel apples loosely in cellophane and tie with a ribbon to gift or store until ready to serve.
Notes
- Using a candy thermometer is crucial for achieving the correct caramel consistency.
- Freezing the apples before dipping helps the caramel set faster and prevents it from sliding off.
- Customize your caramel apples with a variety of toppings to suit your taste and occasion.
- Store caramel apples in the refrigerator and consume within 2-3 days for best freshness.
- Be careful when handling hot caramel to avoid burns.




Leave a Reply