
I absolutely love sharing this fun and nostalgic treat that always brings out smiles: my Homemade Dirt Pudding with Oreo Crumbs and Gummy Worms Recipe. It’s a playful dessert that tastes like rich, creamy chocolate pudding surrounded by crumbly Oreo “dirt” and topped with colorful gummy worms wriggling on top. This recipe has become one of my favorites for gatherings and weeknight indulgences alike because it’s simple to make, visually delightful, and deliciously satisfyingly chocolatey. I can’t wait for you to try it and see how it charms both kids and adults!
Why You'll Love This Homemade Dirt Pudding with Oreo Crumbs and Gummy Worms Recipe
What really excites me about this Homemade Dirt Pudding with Oreo Crumbs and Gummy Worms Recipe is the playful combination of flavors and textures. The pudding itself is luxuriously smooth and rich from the homemade chocolate base, perfectly balanced with the slight crunch and sweetness of crushed Oreos. Then, the gummy worms add just the right amount of chewy fun that makes each bite an adventure. To me, this isn’t just dessert — it’s an experience that reminds me of carefree days and childhood treats with a grown-up twist.
Another reason I adore this recipe is how straightforward it is to whip up. You don’t need any fancy equipment or obscure ingredients, but each step is thoughtfully designed to build layers of flavor and texture effortlessly. I find it perfect for all sorts of occasions — whether it’s a casual family dinner, a lively birthday party, or even a festive holiday dessert. What makes it stand out is how it combines nostalgia, simplicity, and impressive presentation all in one. Honestly, it’s one of those recipes that makes me feel like a dessert rockstar every time I serve it.
Ingredients You'll Need
All the ingredients in this recipe are straightforward yet essential for creating that perfect homemade pudding with a crumbly, chocolatey base and playful gummy worm topping. Each one adds a unique element to the rich, creamy, sweet, and fun final dessert.
- Granulated sugar: Adds balanced sweetness that complements the cocoa without overpowering it.
- Unsweetened natural or Dutch-process cocoa powder: Provides that deep chocolate flavor and rich color essential for the pudding base.
- Cornstarch: The key thickening agent that turns the liquid ingredients into a luscious pudding texture.
- Salt: Enhances the chocolate flavor by balancing the sweetness and adding depth.
- Whole milk: Creates a creamy, smooth texture; I find whole milk works best, but you can experiment with alternatives if needed.
- Unsalted butter: Adds silkiness and richness to the pudding when stirred in at the end.
- Pure vanilla extract: Brings warmth and complexity that rounds out the chocolate flavors beautifully.
- Oreo cookies: Crushed to create the “dirt” layers that bring texture and that beloved chocolate-cookie crunch.
- Gummy worms: The fun, playful garnish that adds a whimsical, colorful touch perfect for parties and family treats.
Directions
Step 1: Start by whisking together the granulated sugar, cocoa powder, cornstarch, and salt in a medium saucepan over medium heat. This dry mix is the foundation for your chocolate pudding, ensuring an even distribution of cocoa and sweetener.
Step 2: Slowly pour in the milk while whisking continuously to avoid lumps. This takes patience, but it’s important because it helps the pudding develop that silky, lump-free texture.
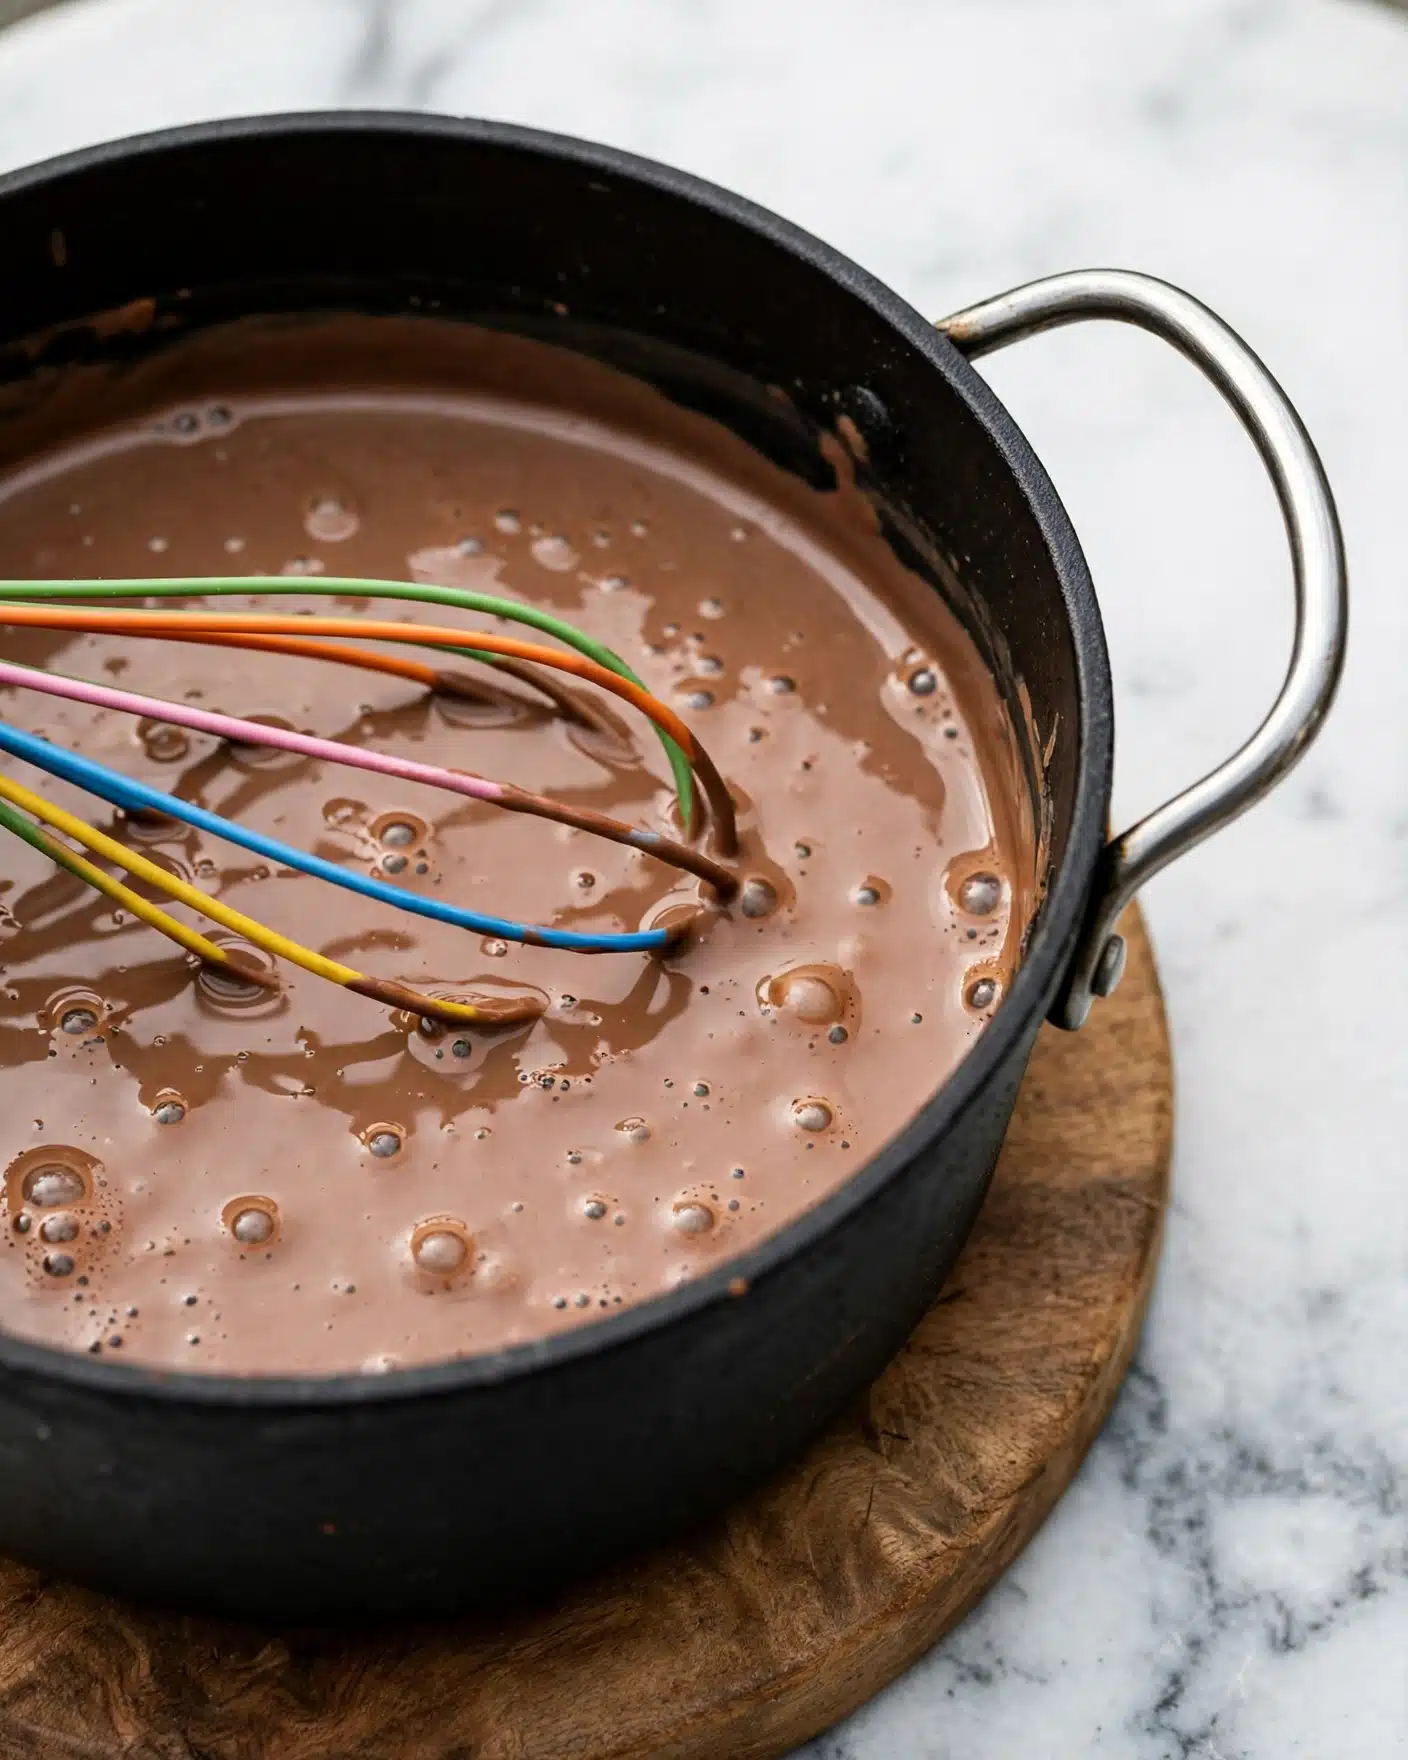
Step 3: Bring the mixture to a gentle boil, whisking occasionally for about 10 minutes. It’s crucial not to rush this by turning up the heat, or the pudding won’t thicken properly. You’ll notice bubbling first around the edges, then in the center. When it boils in the center, whisk non-stop and let it boil for 1 full minute — this tells you it’s thickened perfectly.
Step 4: Remove the pan from heat and whisk in the softened butter and vanilla extract. This enriches the pudding and adds a lovely creamy finish.
Step 5: Pour the pudding into a heatproof bowl and let it cool for 5 minutes. Then, press plastic wrap directly onto the surface to prevent a skin from forming. Refrigerate for at least 1 hour—this ensures the pudding sets slightly, so it’s easier to layer later.
Step 6: While the pudding chills, pulse the Oreos in a food processor or blender until they become fine crumbs — this is your "dirt" layer that’s so essential to the fun feel of this dessert.
Step 7: Now it’s time to assemble! You can use individual cups, a trifle bowl, or a 9-inch baking pan. Start by layering a couple of tablespoons of Oreo crumbs in the bottom, then spoon about ¼ cup of pudding on top. Repeat with another Oreo crumb layer, more pudding, and finish with a generous final layer of crumbs.
Step 8: Nestle several gummy worms into the top of the final Oreo “dirt” layer for that playful, eye-catching look.
Step 9: Refrigerate the assembled dirt pudding uncovered for at least 3 hours to let the layers meld and the pudding firm up fully. It’s best enjoyed within 48 hours for peak freshness.
Step 10: If you have leftovers, cover them and store in the fridge for up to 3 days to enjoy later.
Servings and Timing
This recipe makes approximately 8 servings, which is perfect for sharing with family and friends. The prep time for the pudding is about 15 minutes, but remember the pudding needs to cook and thicken for around 10 minutes on the stove. Then, factor in at least 1 hour of chilling before assembling and another 3 hours of refrigeration after assembly. In total, you’re looking at roughly 4 hours and 50 minutes from start to finish, mostly hands-off time to allow for chilling and setting. This means you can prepare the pudding in advance and assemble it closer to serving time for convenience.
How to Serve This Homemade Dirt Pudding with Oreo Crumbs and Gummy Worms Recipe
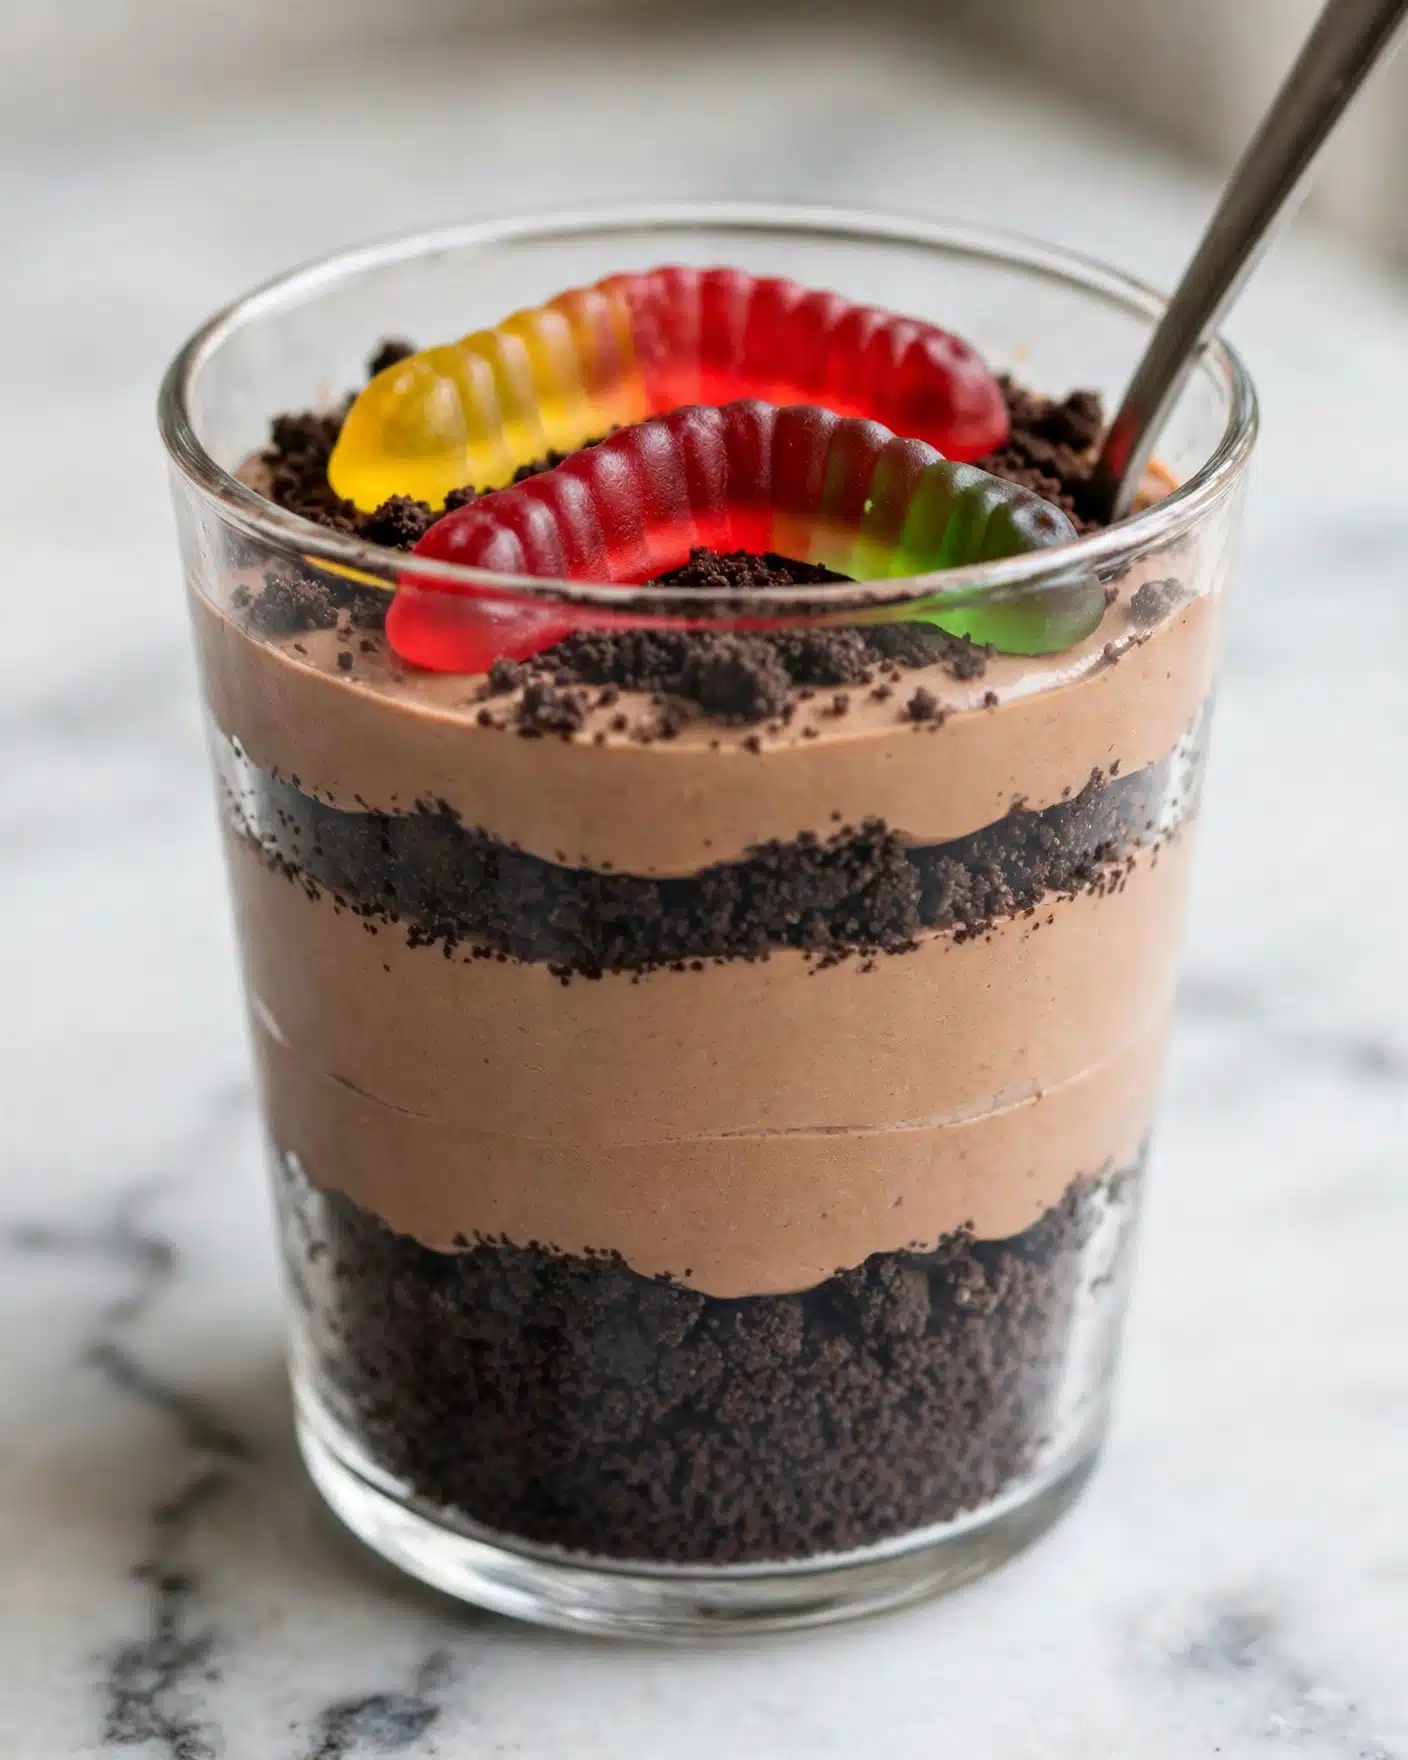
When it comes to serving this Homemade Dirt Pudding with Oreo Crumbs and Gummy Worms Recipe, I love to get creative to make it as inviting as possible. I usually serve it chilled straight from the refrigerator because the cool temperature makes the pudding silky smooth and refreshing, especially after a hearty meal. I like to portion it into clear individual cups or jars so the distinct layers of Oreo crumbs and glossy chocolate pudding are visible, which always sparks excitement.
To garnish, I sometimes add a few extra Oreo crumbs on top for a contrasting crunch and arrange the gummy worms so they peek out just so — it’s almost like they’re crawling up the sides, making it a fun centerpiece for parties or casual family dinners. For an extra touch of indulgence, I might add a dollop of freshly whipped cream or a sprinkle of mini chocolate chips around the edges.
For beverage pairings, I find this dessert pairs wonderfully with non-alcoholic drinks like cold milk, vanilla iced tea, or a sparkling lemonade because these drinks help balance the richness of the pudding while complementing the chocolate and sweet gummy flavors. This dessert shines at birthday parties, potlucks, or anytime you want to add a little whimsy and joy to the table.
Variations
I love that this Homemade Dirt Pudding with Oreo Crumbs and Gummy Worms Recipe is highly adaptable to fit different tastes and dietary needs. For example, if you want to make it gluten-free, just swap the Oreos for a gluten-free chocolate cookie alternative or crushed nuts for texture. If you need a vegan option, you can use non-dairy milk like almond or oat milk and replace butter with a plant-based margarine, choosing vegan-friendly chocolate cookies and gummies to keep everything harmonious.
For flavor twists, I sometimes add a pinch of cinnamon or instant espresso powder to the pudding to deepen the chocolate flavor with a warm, earthy note. Another idea is to swap out gummy worms for fresh berries or chocolate chips if you want a less sweet or more natural garnish. You can even experiment with layering peanut butter or caramel swirls between the pudding and cookie crumbs for a decadent surprise.
While this pudding is traditionally cooked on the stovetop, you could try a no-cook pudding mix combined with instant chocolate pudding and milk to speed things up, though I personally prefer the homemade method because it produces a richer, creamier texture that you just can’t beat.
Storage and Reheating
Storing Leftovers
After enjoying your dirt pudding, it’s best to store any leftovers in airtight containers or cover your individual cups tightly with plastic wrap. Refrigerate promptly to keep the pudding fresh and prevent the Oreo crumbs from becoming soggy too quickly. Properly stored, leftovers will keep well for up to 3 days, though the gummy worms may lose a bit of their chewiness over time.
Freezing
I don’t typically recommend freezing this dessert because the texture of pudding and Oreo crumbs changes noticeably after thawing — the pudding can become watery and the cookie crumbs lose their crunch. However, if you must freeze it, place it in a tightly sealed freezer-safe container without the gummy worms on top (add those fresh after thawing). Freeze for up to one month and thaw overnight in the refrigerator before serving.
Reheating
This pudding is designed to be enjoyed chilled and doesn't really require reheating. If you prefer it a bit warmer, I suggest letting it sit at room temperature for about 15-20 minutes before serving rather than heating it. Reheating in the microwave or on the stove can cause separation and alter the texture unfavorably. For best results, serve it chilled or at room temperature.
FAQs
Can I make this Homemade Dirt Pudding with Oreo Crumbs and Gummy Worms Recipe ahead of time?
Absolutely! In fact, I recommend making the pudding and chilling it for at least an hour before assembling. Once assembled, the dessert should chill for another 3 hours or overnight to allow the layers to meld perfectly. It’s a great make-ahead treat for parties or busy weeknights.
What can I use instead of Oreos for the cookie crumb layers?
If Oreos aren’t your thing or you need a gluten-free option, crushed chocolate graham crackers, gluten-free chocolate cookies, or even finely chopped nuts work wonderfully. Just be sure to toast nuts lightly if you want extra crunch and flavor.
Are gummy worms the only garnish option?
Not at all! While gummy worms are classic and fun, you can switch things up with fresh berries, mini marshmallows, chocolate chips, or even edible flowers for a more sophisticated look. The garnish should match the occasion and your personal taste.
Can I use low-fat or plant-based milk for the pudding?
Yes, you can substitute whole milk with low-fat or plant-based milks such as almond, oat, or soy milk. Just keep in mind that whole milk adds richness and creaminess which might be slightly diminished with alternatives. For the best texture, choose unsweetened, creamy plant-based milks.
How do I prevent a skin from forming on top of the pudding?
The best way is to cover the surface of the pudding tightly with plastic wrap immediately after it has cooled slightly. This seals off the pudding from air, stopping a skin from forming and keeping it perfectly smooth for assembly.
Conclusion
I hope you feel inspired to whip up this Homemade Dirt Pudding with Oreo Crumbs and Gummy Worms Recipe because it truly is one of those desserts that’s both delightful and effortless to make. Its creamy, chocolatey goodness combined with crunchy cookie layers and playful gummy worms is a guaranteed crowd-pleaser in my book. Whether you’re feeding a party, surprising the family, or just indulging yourself, this recipe has such a joyful vibe. Dive in and enjoy every fun, delicious spoonful!
PrintHomemade Dirt Pudding with Oreo Crumbs and Gummy Worms Recipe

This Homemade Dirt Pudding recipe is a fun and delicious dessert that combines creamy chocolate pudding with crunchy Oreo cookie crumbs and gummy worms to create a playful dirt cup treat. Perfect for parties and kids, this no-bake layered dessert is easy to prepare and requires chilling to achieve the perfect pudding texture.
- Prep Time: 15 minutes
- Cook Time: 15 minutes
- Total Time: 4 hours 50 minutes
- Yield: 8 servings
- Category: Dessert
- Method: Stovetop
- Cuisine: American
Ingredients
For the Pudding
- 1 and ⅓ cups (267g) granulated sugar
- ½ cup (42g) unsweetened natural or Dutch-process cocoa powder
- ⅓ cup (40g) cornstarch
- ¼ teaspoon salt
- 4 and ½ cups (1,080ml) whole milk
- 3 Tablespoons (43g) unsalted butter, softened to room temperature
- 2 teaspoons pure vanilla extract
For the Assembly
- 24–30 Oreo cookies (or about 1 standard package)
- 24 gummy worms
Instructions
- Prepare the pudding mixture: Whisk together granulated sugar, unsweetened cocoa powder, cornstarch, and salt in a medium saucepan. Gradually pour in the whole milk while continuously whisking to combine all ingredients smoothly.
- Cook the pudding: Place the saucepan over medium heat and bring the mixture to a boil, whisking occasionally. This process will take about 10 minutes; avoid increasing the heat to speed it up, as the pudding needs to thicken properly. Once the mixture starts bubbling around the edges and then the center, whisk constantly and allow it to boil for 1 minute until it coats the back of a spoon without dripping.
- Add finishing touches: Remove the saucepan from the heat, then whisk in the softened unsalted butter and pure vanilla extract until fully incorporated and smooth.
- Cool the pudding: Pour the pudding into a heatproof bowl and let it sit for 5 minutes. Cover the surface directly with plastic wrap to prevent a skin from forming. Refrigerate for 1 hour; the pudding will not be fully thickened yet, allowing for easier assembly later.
- Prepare the Oreo crumbs: Place the Oreo cookies into a food processor or blender and pulse until they become fine crumbs.
- Assemble the dirt cups: You can serve the dessert in individual cups, a trifle dish, or a 9-inch baking pan. Start by layering a couple of tablespoons of Oreo crumbs at the bottom. Add ¼ cup of pudding on top, then sprinkle more Oreo crumbs followed by another ¼ cup of pudding. Finish with a final Oreo crumb layer.
- Add gummy worms and chill: Place a few gummy worms on the top layer of Oreo crumbs, then refrigerate uncovered for 3 hours to allow the pudding to set and flavors to meld.
- Store leftovers: Cover and store any leftover dirt pudding cups in the refrigerator for up to 3 days.
Notes
- Use whole milk for the creamiest pudding, but 2% milk can be substituted.
- Make sure to cover the pudding with plastic wrap directly on the surface to prevent skin formation while chilling.
- The pudding should be thick enough to coat a spoon but still pourable for layering.
- You can adjust the amount of Oreo crumbs and pudding layers according to the size of your serving cups or dish.
- This dessert is best enjoyed within 48 hours for optimal freshness and texture.




Leave a Reply